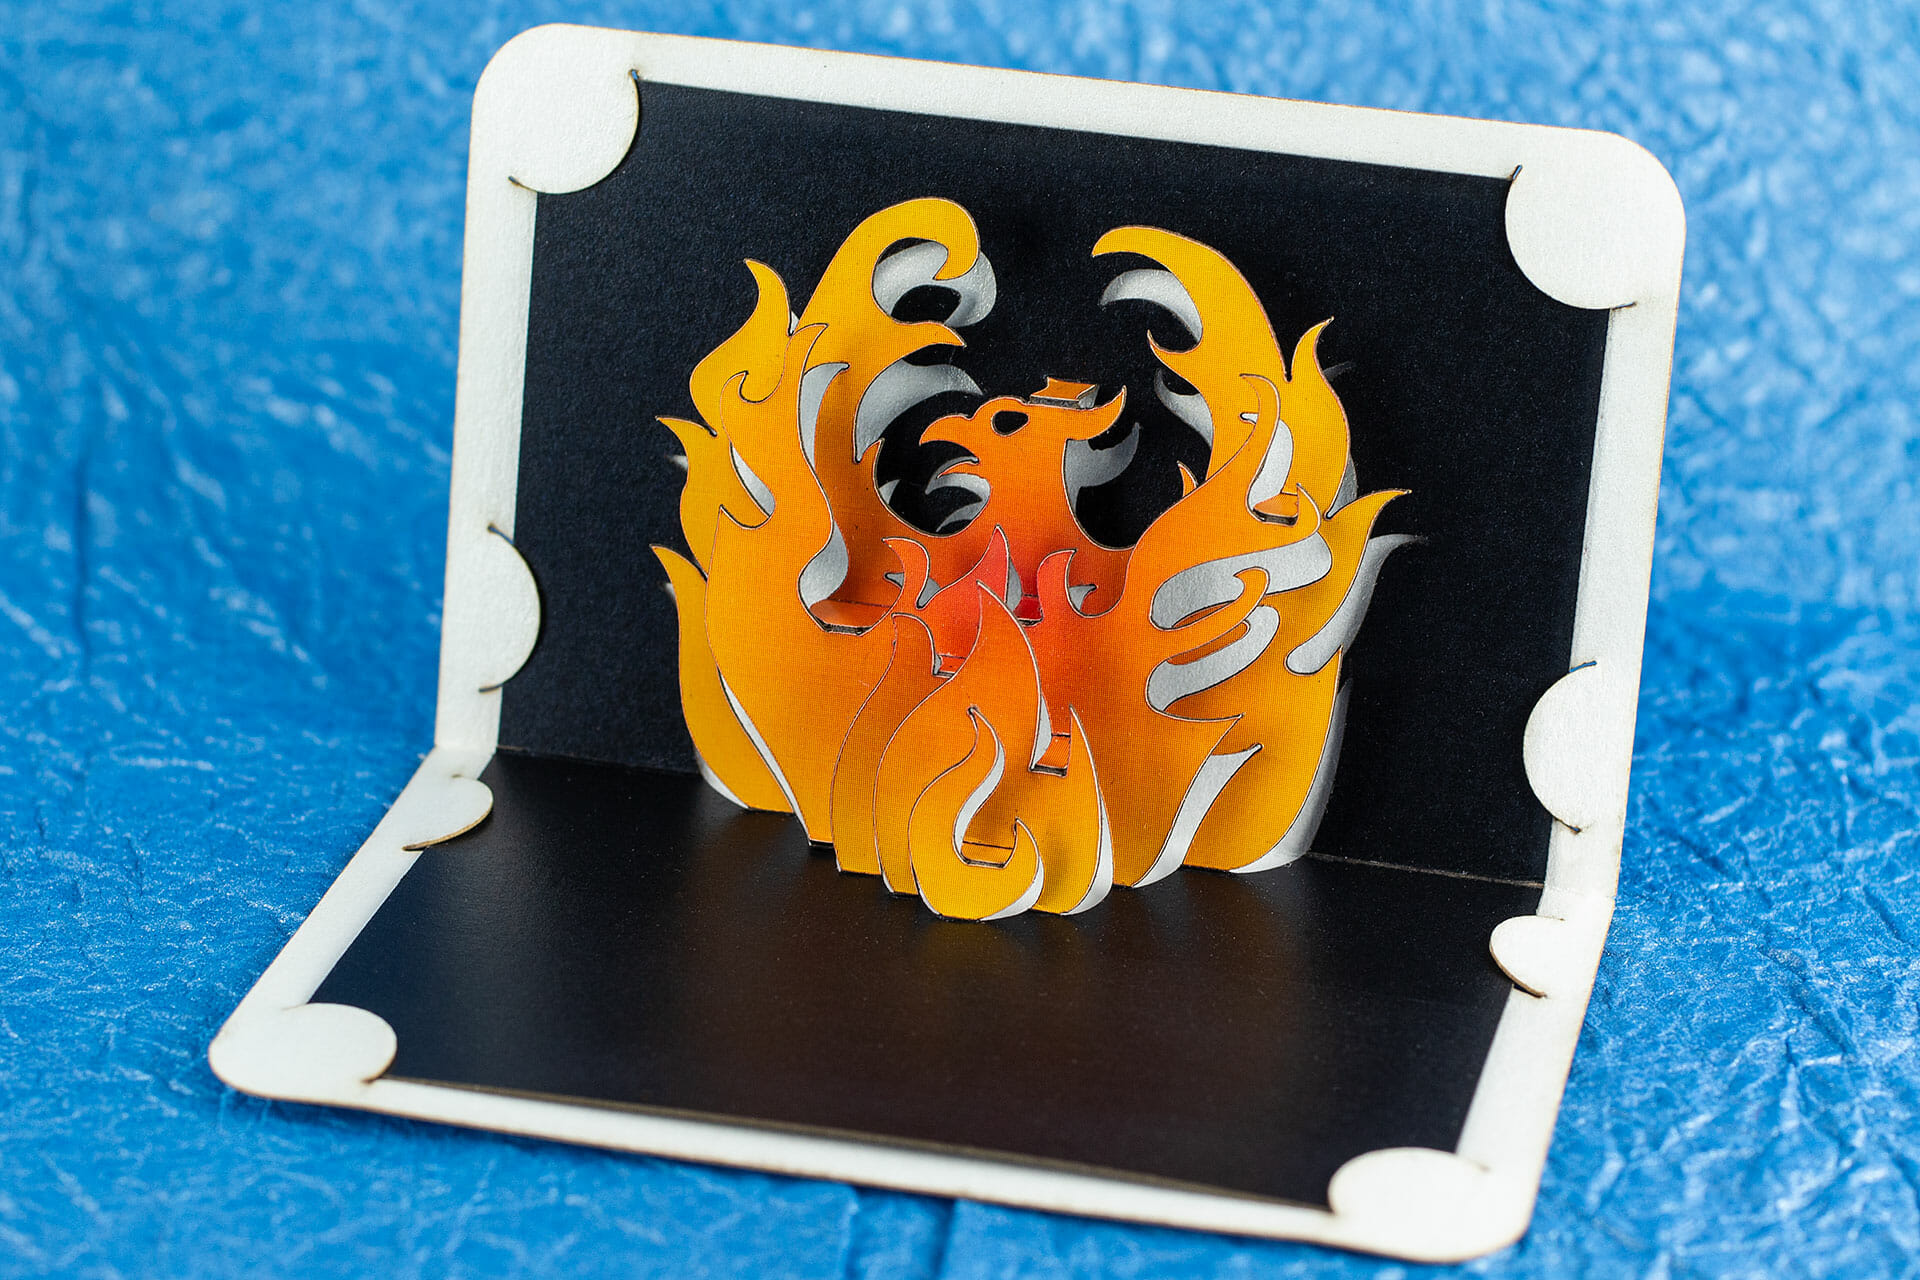
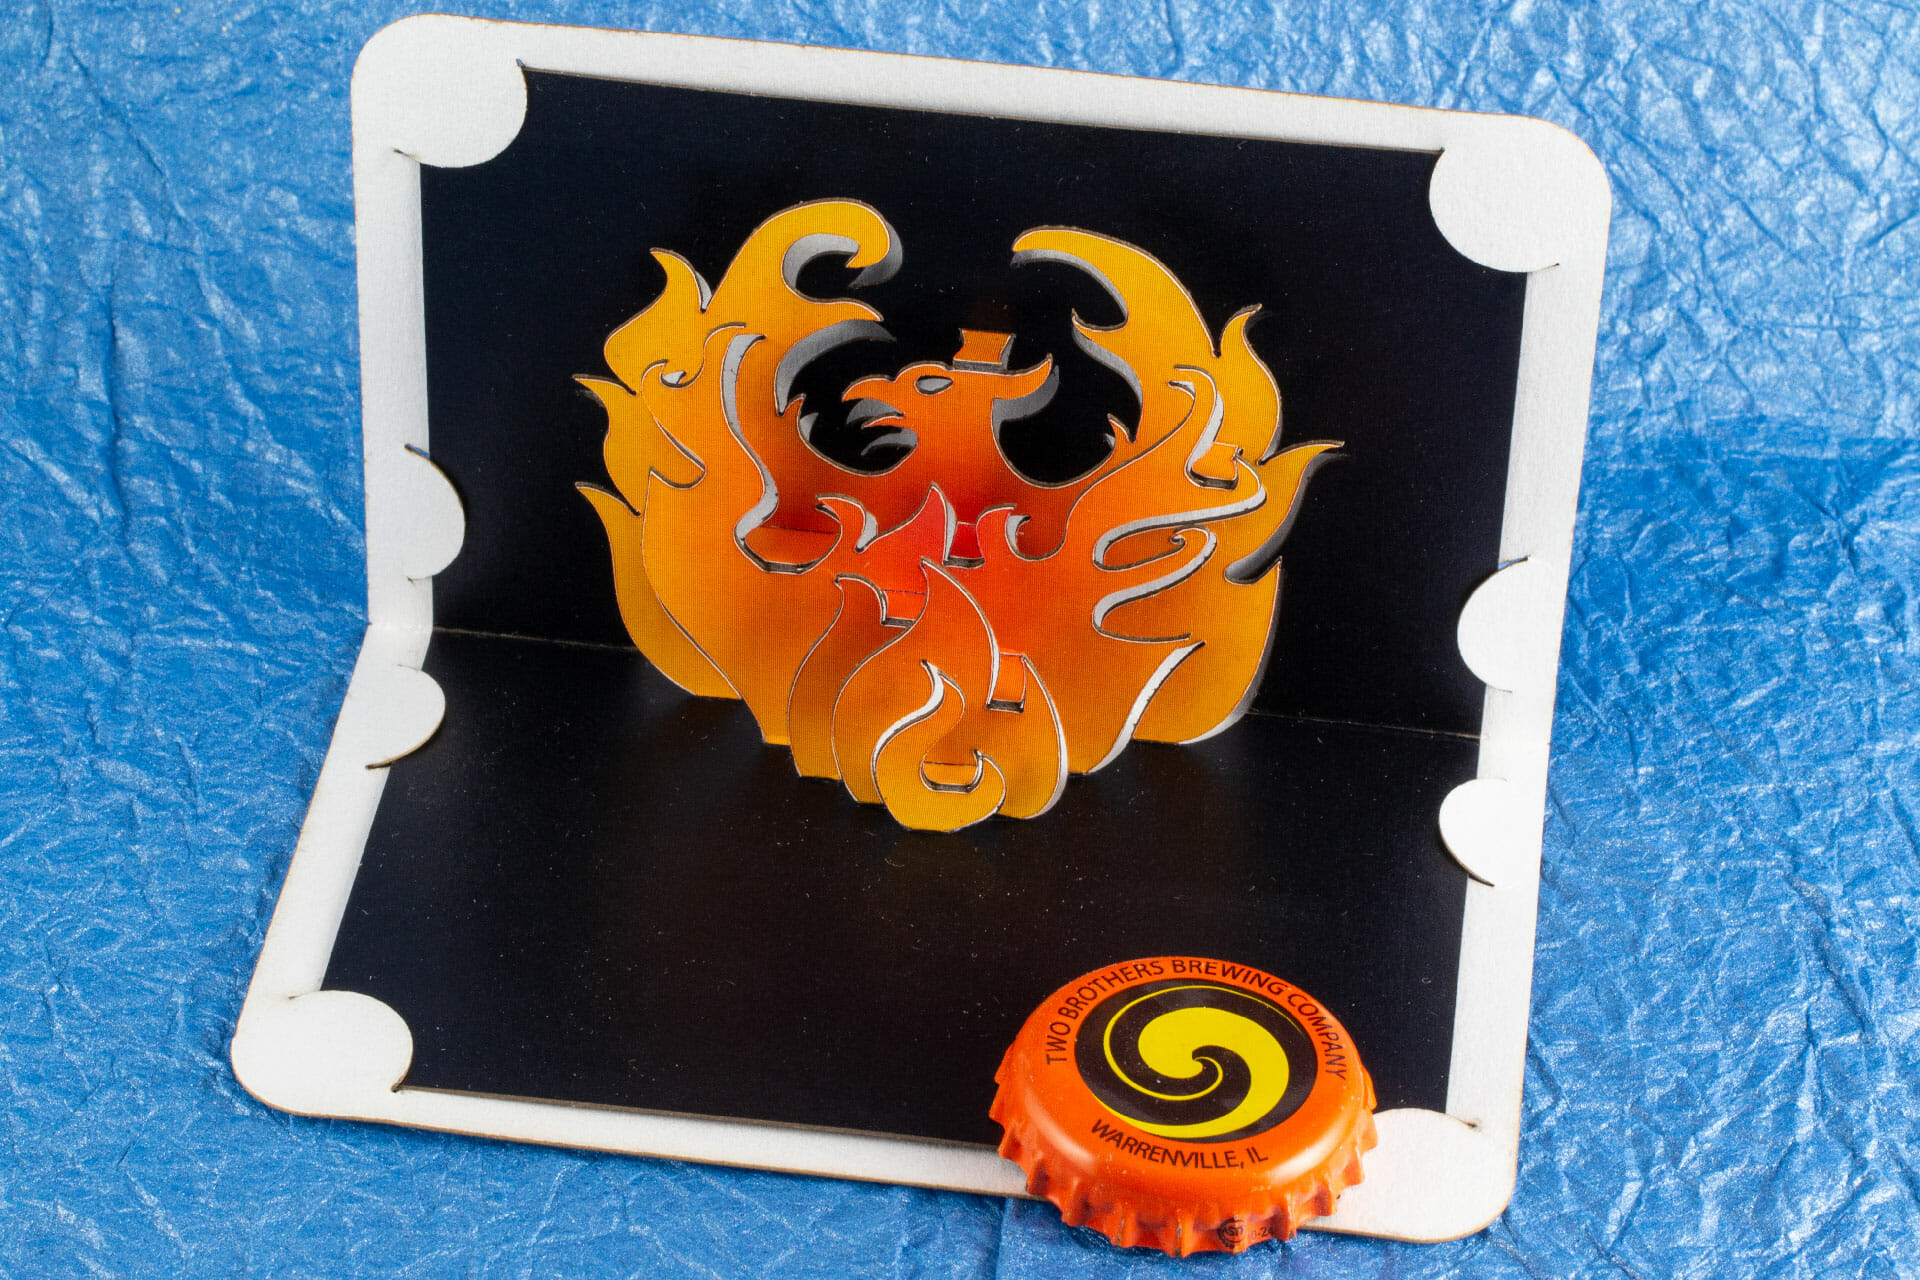
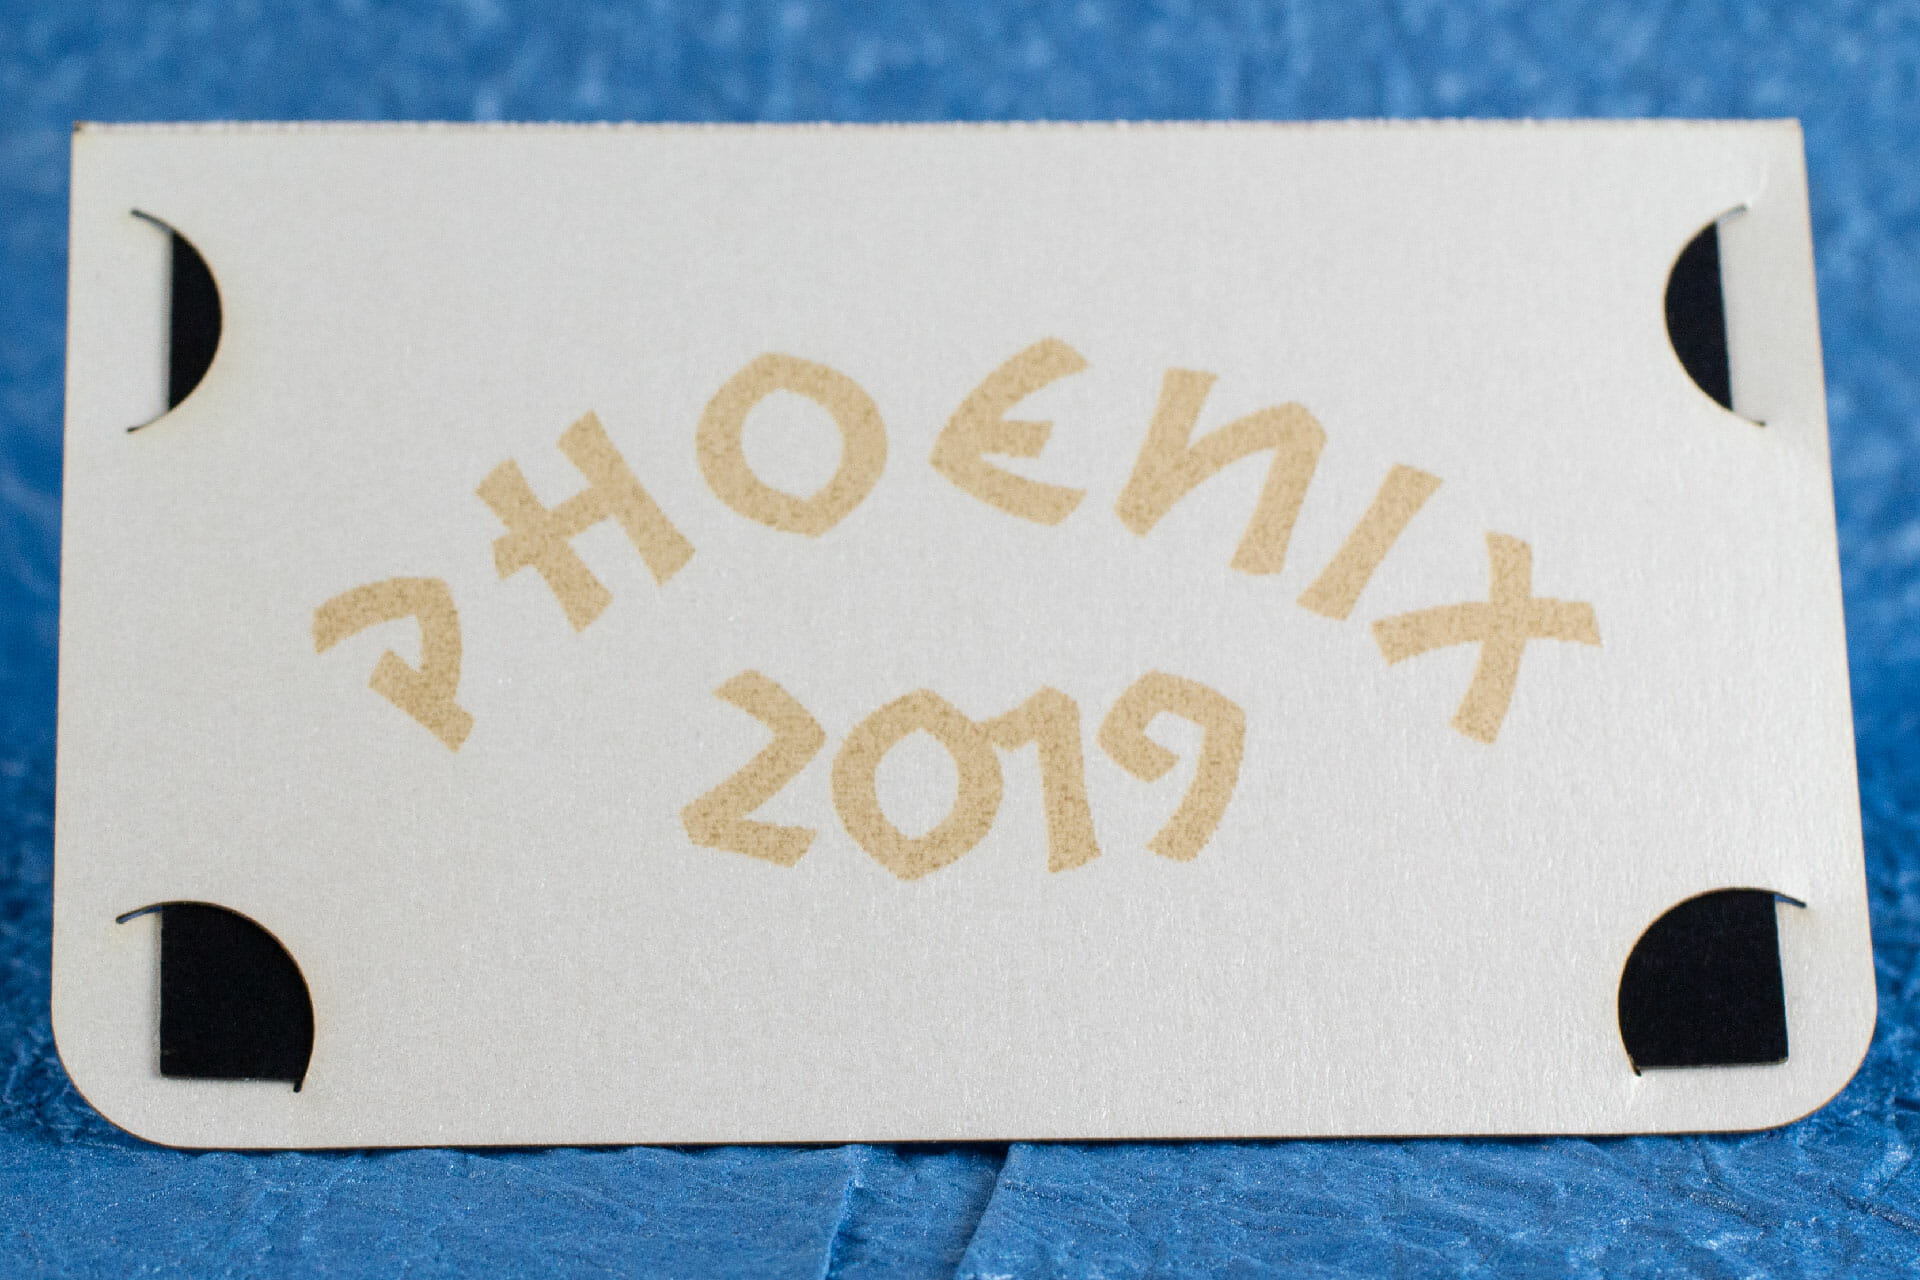
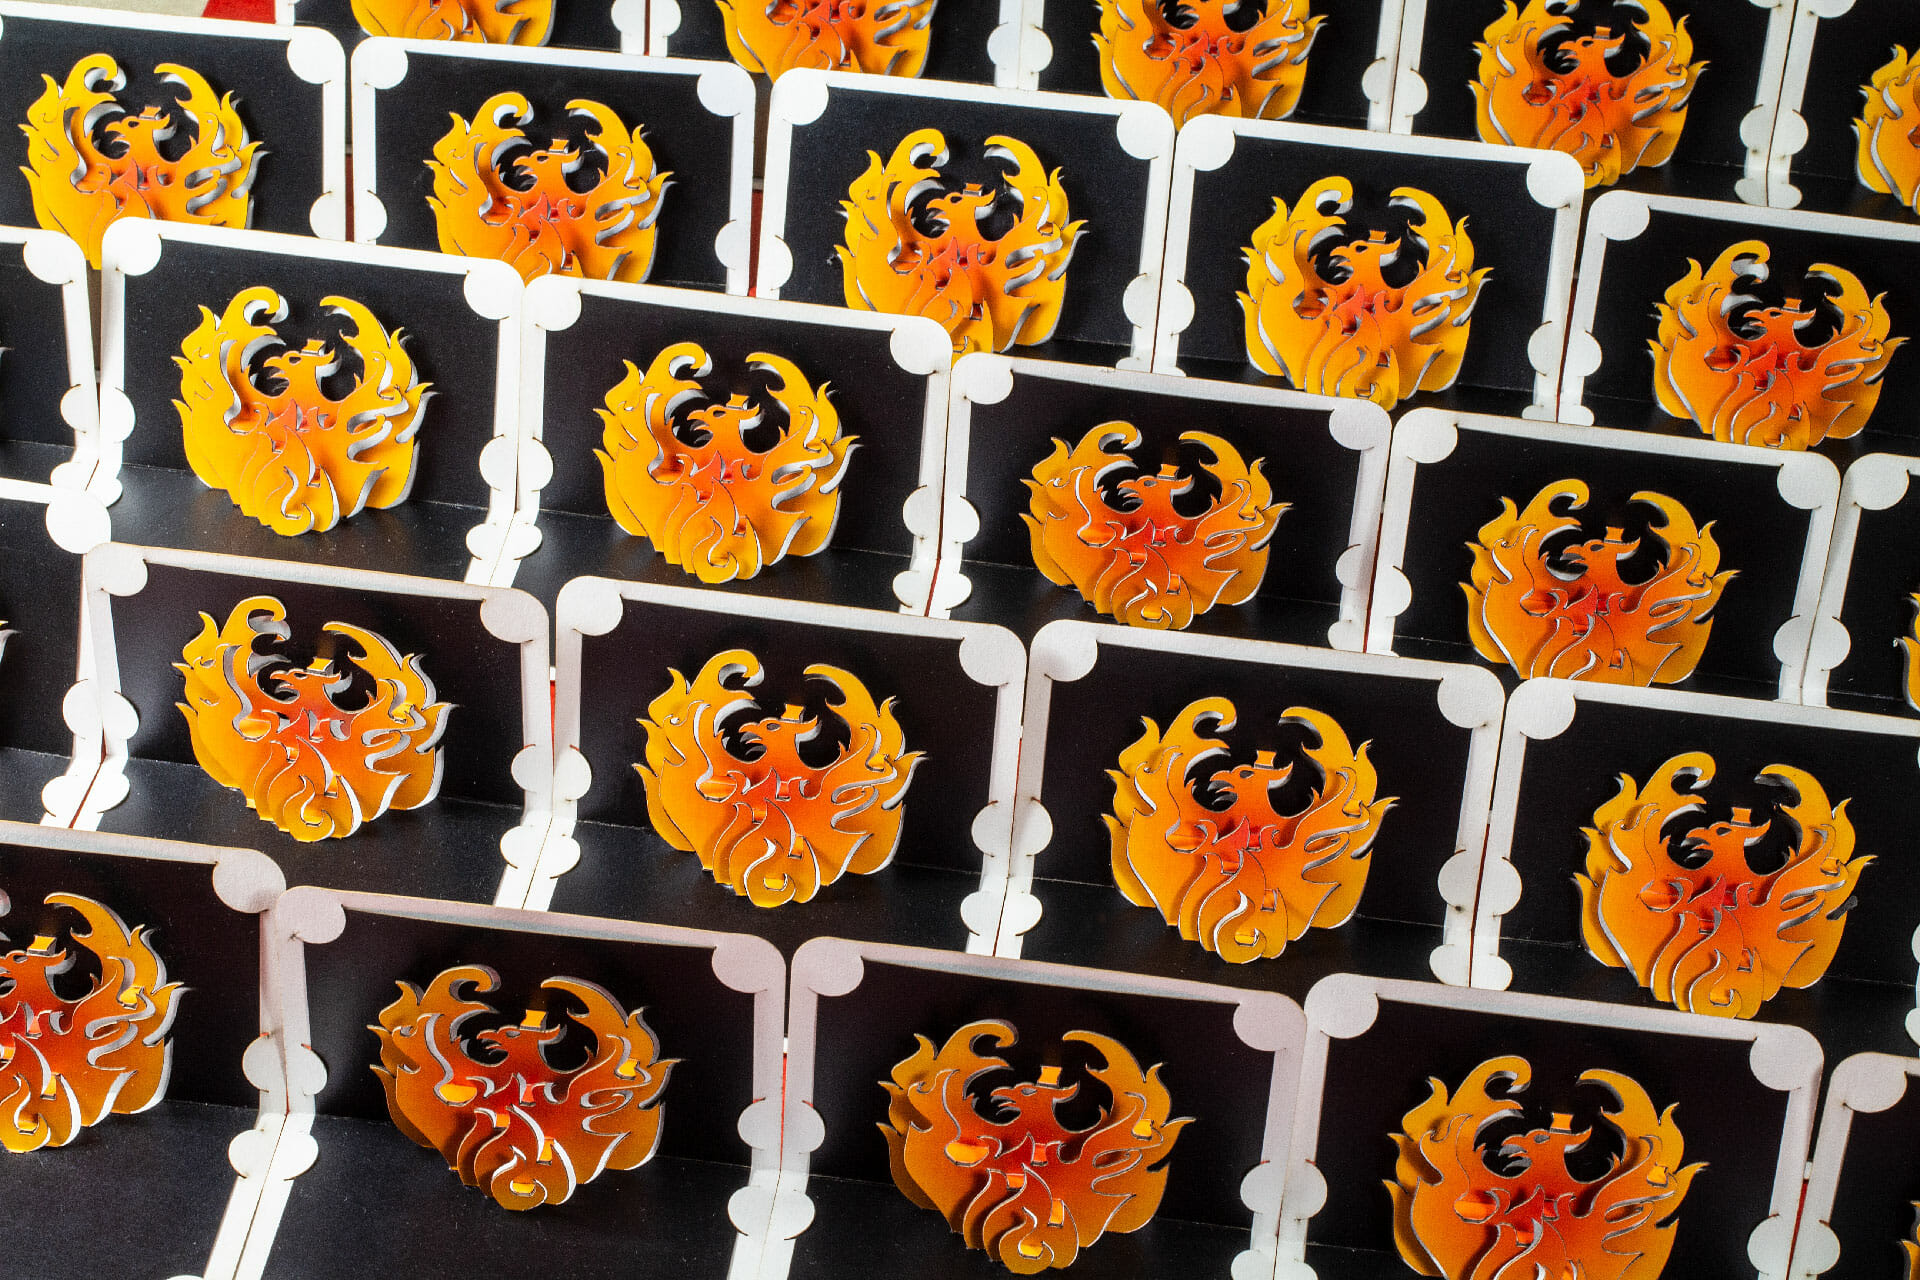
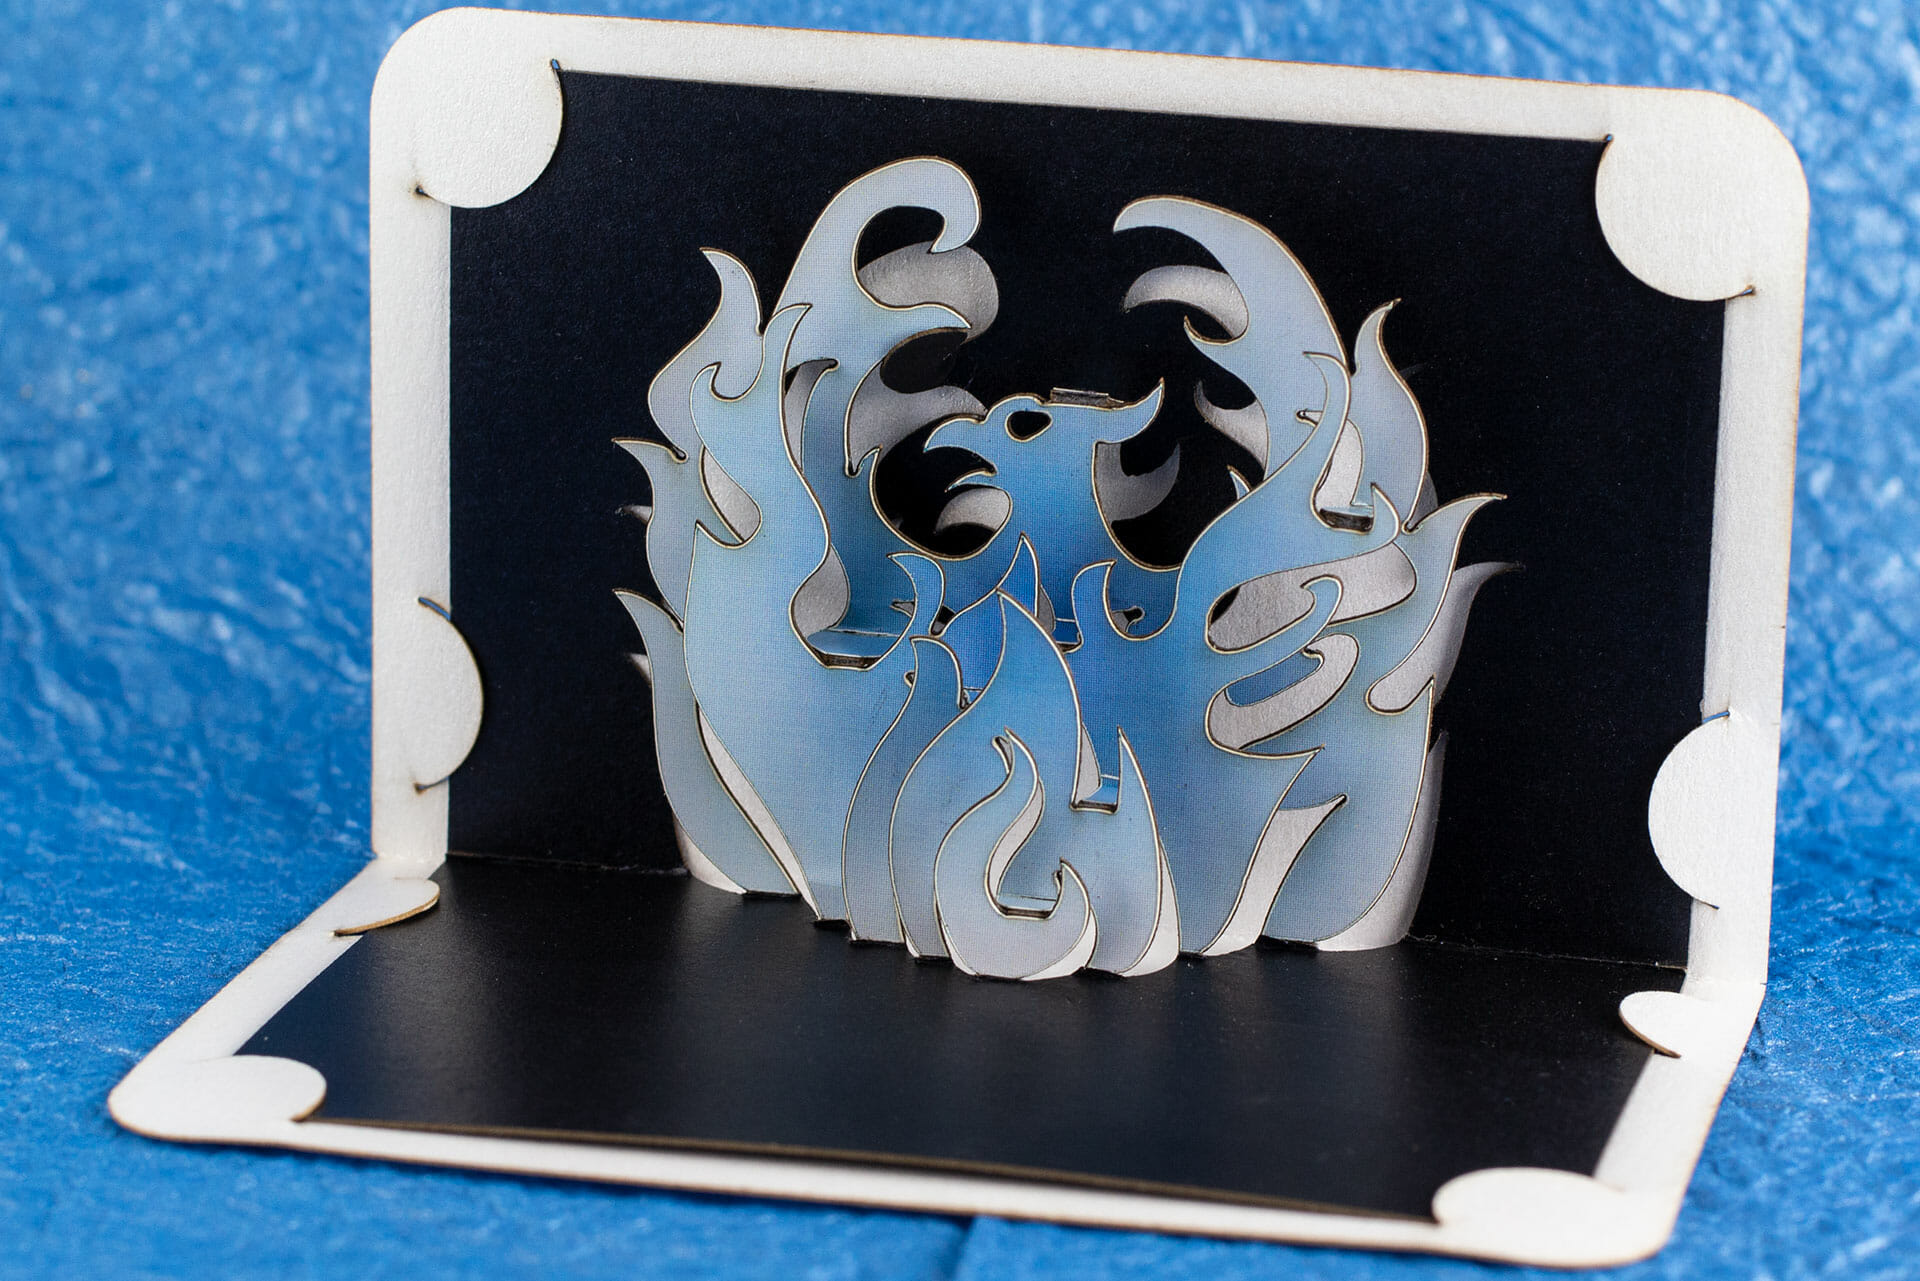
Phoenix Pop Up Card

Phoenix Pop Up Card by Andrew Crawford

My latest OA-style pop up card project is this little phoenix. After several experiments, I decided that a black background really helped to make the bird pop. I came up with an interesting approach to make that happen. The color is printed on a polyester sticker that goes on the stock, is cut, then weeded. The result is pretty spectacular.

Another great discovery was that the pearlescent stock I used for the backing cards engraves to a metallic gold. It’s better in person than in the photos. My original plan had been to stamp and emboss but, the engraving is perfect and easy.

The finished cards are 3.5″ by 2.25″ and, fit perfectly in some metallic black mini envelopes I found.

I made a few dozen of them to share.

Make a Flower Press

flower press

The father of a friend of mine made her a really great flower press as a holiday present. She planted a whole bed of wildflowers in her front yard and, has turned them into some really great cards. I was inspired to make presses for some of my favorite youngsters and, came up with a design that I like a lot.

I produced this from a few sheets of Baltic birch plywood and a handful of hardware using the new laser cutter. The base is two sheets of ply, one 1/8” and one 1/4”, glued together with captive washers and small magnets to hold the bolts in place while turning it over. The hex heads on the bolts are held in place by cutouts to keep them from spinning while tightening the wing-nuts.

If you would like to make a flower press of your own, this post contains all the instructions and cutting files. Note that I am releasing this for personal, non-commercial use. Make one for yourself. Make one for a gift. If you want to make them to sell, you need to check with me first.

Ok! Let’s drop the BOM! (That’s “Bill Of Materials” …)

You will need:

Qty Description
4 3” x 1/4” hex head bolts
8 1 1/4” flat washers with 1/4” holes
4 1/4” wing-nuts (that fit the bolts …)
1 12” square sheets of 1/8” thick Baltic birch plywood
2 12” square sheet of 1/4” thick Baltic birch plywood
4 1/8” x 1/8” x 1/16” neodymium magnets
A few sheets of corrugated cardboard (e.g., shipping boxes)
A few sheets of plain paper (e.g., copier paper)

You will also need some CA and/or wood glue.

There are detailed assembly instructions in the video but, basically, you cut one of each piece (washer layer in 1/4″ ply, the other two in 1/8″), glue in the magnets, put the washers in the engraved pockets, glue the two layers of the base together, clamp and let dry. The bolts go through the holes with the heads in the hex pockets. The cardboard gets stacked alternating with the paper. The top piece goes onto the bolts and, the wing-nuts go on the bolts to hold everything snugly.

These files do not include my Snowflake Celtic knotwork mandala or the Evermore Studio logo. You can add your own art by centering it on the top layer (where the knotwork is in mine) and, on the hex layer (where the logo is on mine). You will need to flip the hex layer for engraving any artwork as the magnet pockets and art need to be on opposite sides. Self-jigging works great for that.

Use extra care while cutting the cardboard pieces. There have been several Glowforge-destroying fires reported in the forums and, cardboard is an optimum combustion material. When cutting cardboard, I standby with a spray bottle the whole time.

The paper is just cut into 7 1/2″ squares.  It was a lot more efficient to use a simple rotary cutter than to run individual sheets through the laser.

Machine Settings

Washer Layer pockets: 600 speed / Full power / 225 LPI / Vary Power

Washer Layer cuts: 125 speed / Full power

Hex Layer magnet pockets: 800 speed / Full power

Hex Layer cuts: 125 speed / Full power

Top Layer cuts: 125 speed / Full power

Engraves (when adding your own): 600 speed / 80 power / 225 LPI / Vary Power

Cardboard: 200 speed / 85 power

These settings are a for a Glowforge Basic.  Full power is different on the other models.  There can also be variation for a given batch of plywood or cardboard.  So, test to make sure your cuts worked before moving anything in the machine.

Pattern Files

Important: These files are for personal, non-commercial use only. If you want to produce these to sell or for other business use, please contact me to arrange for licensing terms.

Attribution-Creative Commons NonCommercial-ShareAlike

Right-click and “Save Link As”:

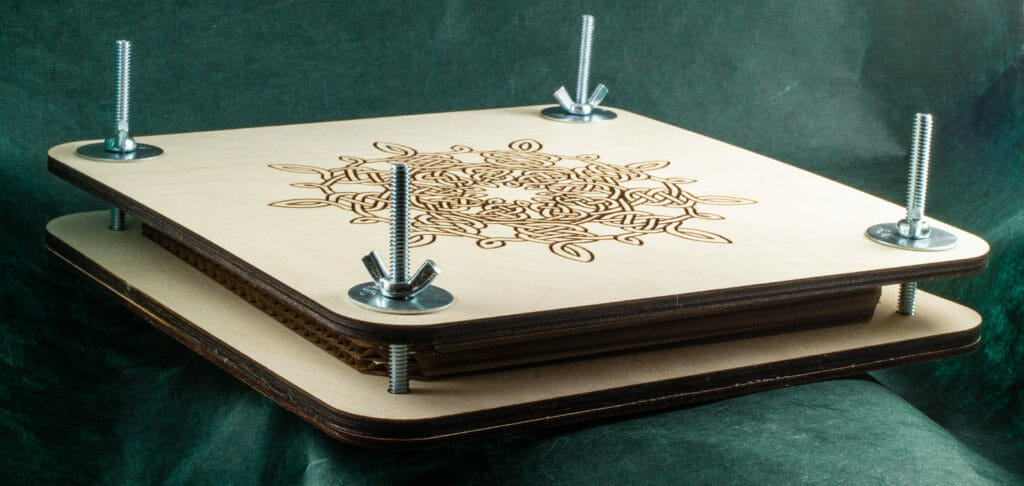
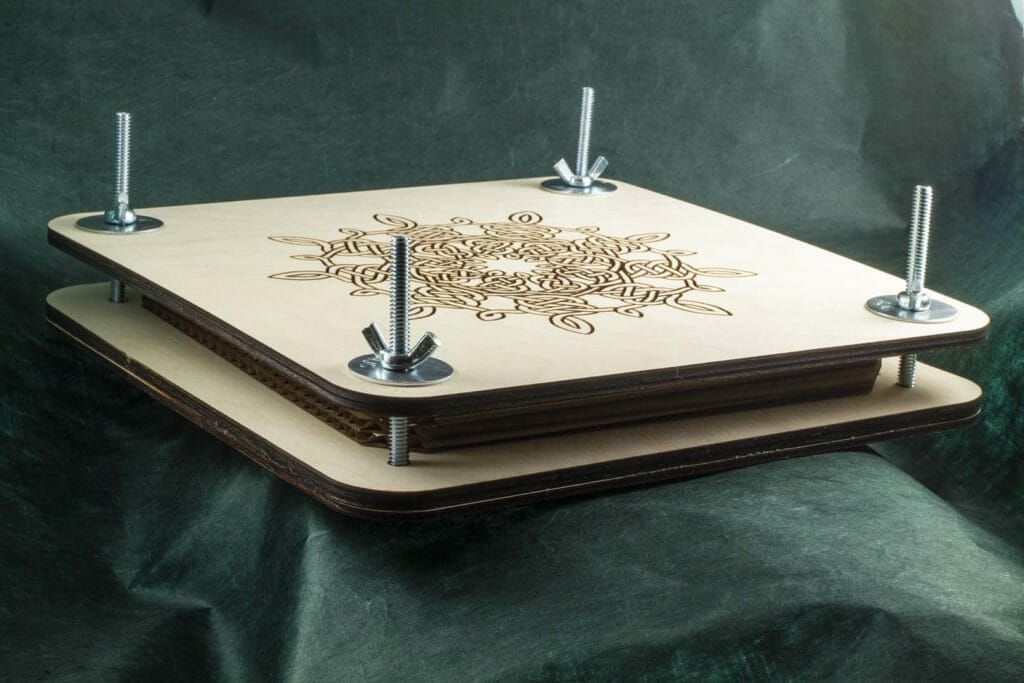
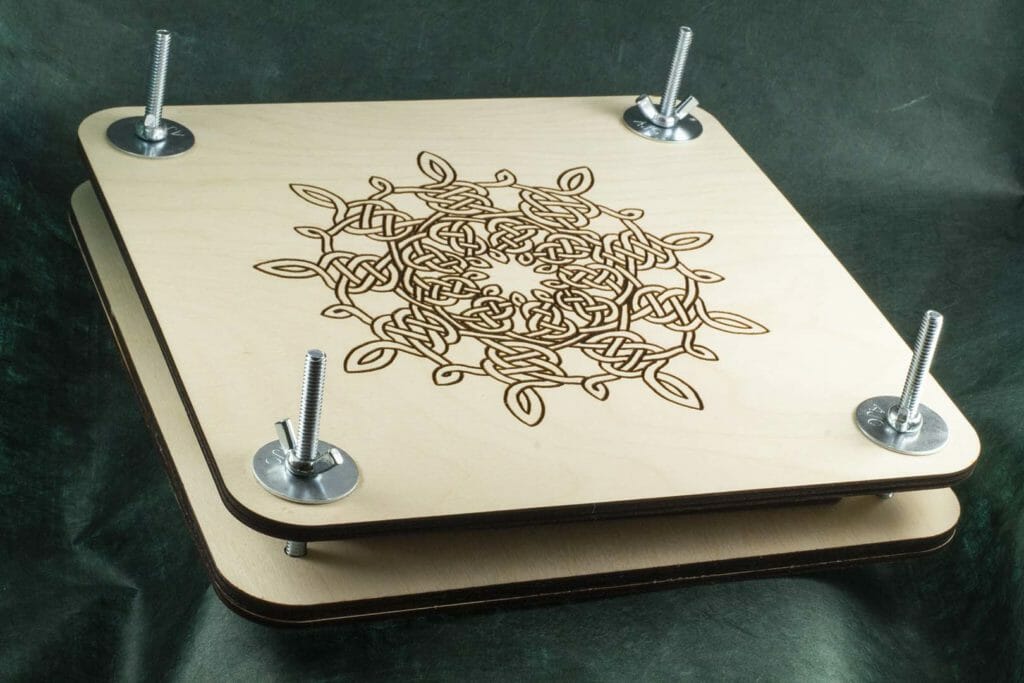
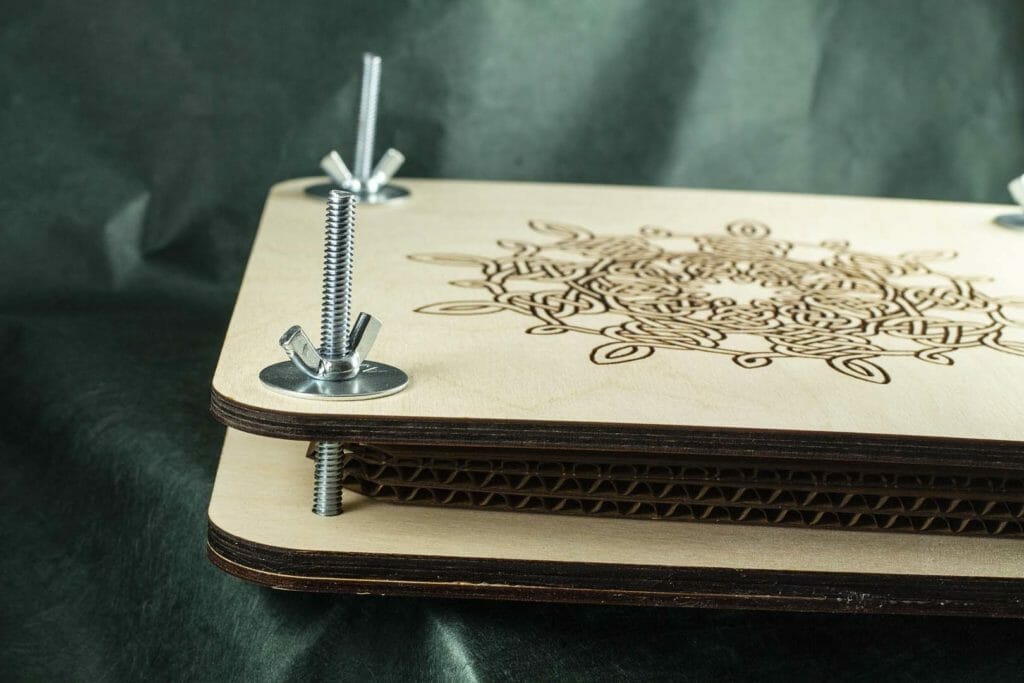
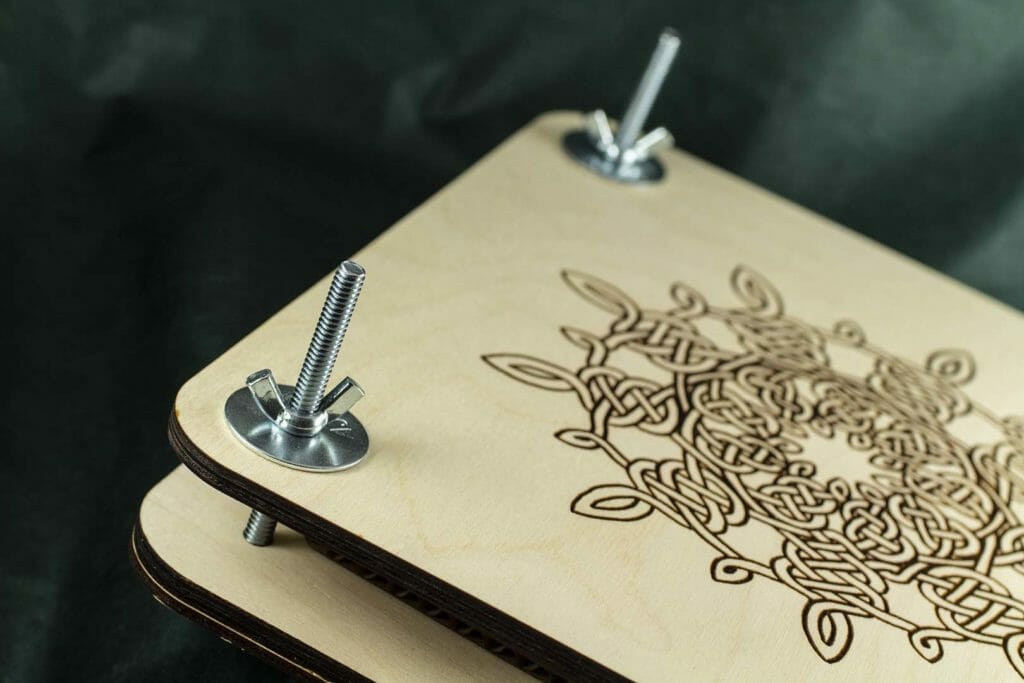
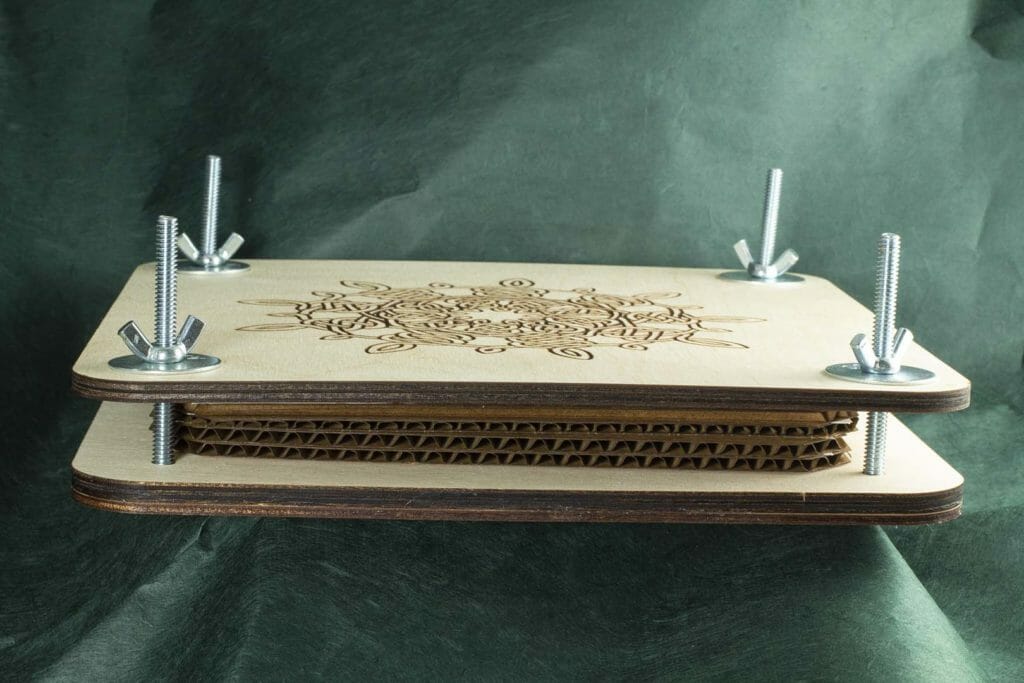
Flower Press Washer Layer SVG (cut 1 from 1/4″ ply)

Flower Press Hex Layer SVG (cut 1 from 1/8″ ply)

Flower Press Top Layer SVG (cut 1 from 1/4″ ply)

Flower Press Cardboard Inserts (cut 4-8 from corrugated cardboard)

Resources

Need a Glowforge? Using my referral link is an excellent way to help support projects like this and, encourage me to do more.  You can read more about my Glowforge in this post. Get one here:

Glowforge Laser Cutter

You are almost certainly better off getting your Baltic birch plywood from a local supplier, both for cost and for supporting your local community. The plywood I used in this case, though, did come from an Amazon supplier.  Here are the links:

1/8″ x 12″ x 12″ Baltic Birch

1/4″ x 12″ x 12″ Baltic Birch

Silicon Glue Spreading Tools

Non-Metallic Tweezers

Sanding Sponges

Magnets

Lil Chizler scraping tool

TransferRite Ultra 592U High Tack White Transfer Tape (which came from a site that is currently down)

Amazon referral links support a local arts organization.

If you have suggestions for how to improve this design, please leave them in the comments or, use the contact form to message me.

Pop Up Card Stands

Magnetic hardwood pop up card stands in maple, cherry and walnut.

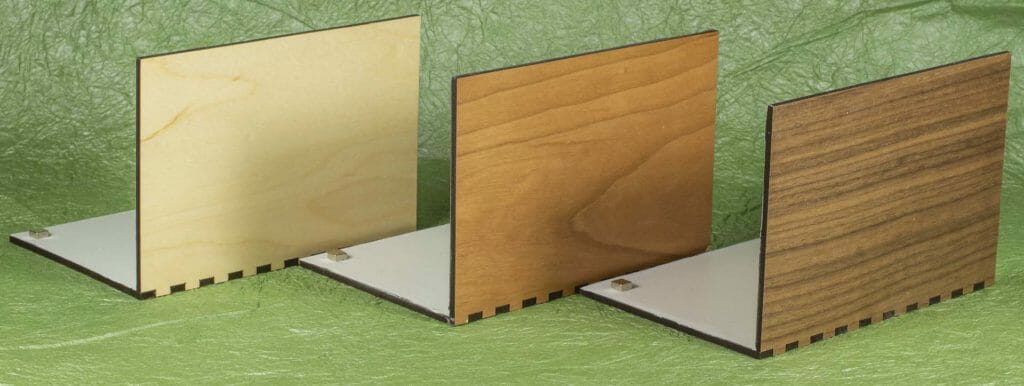
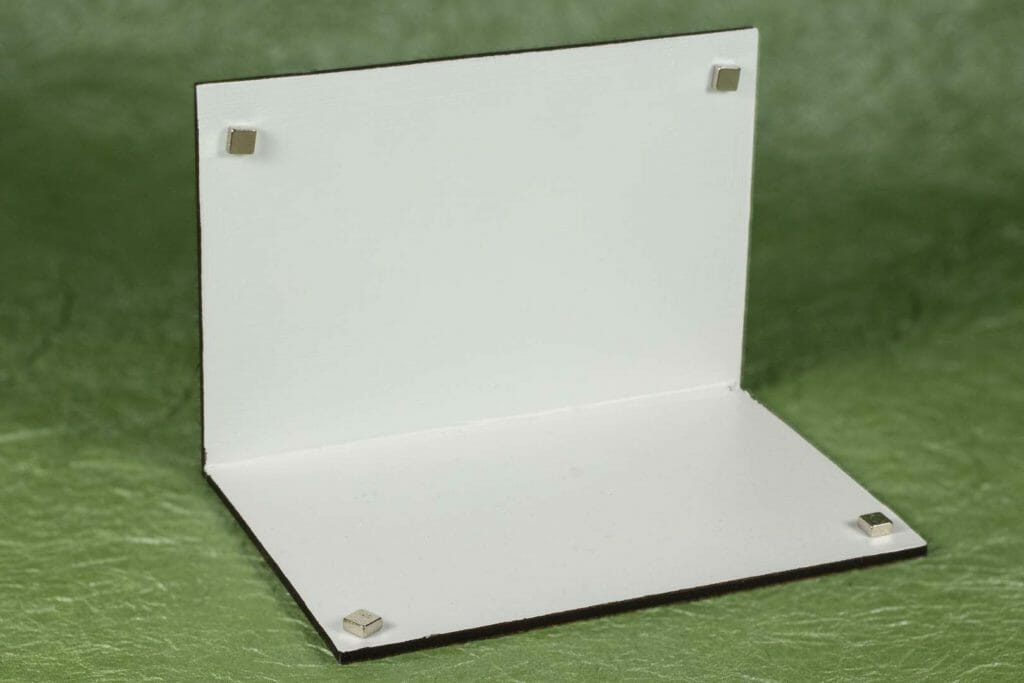
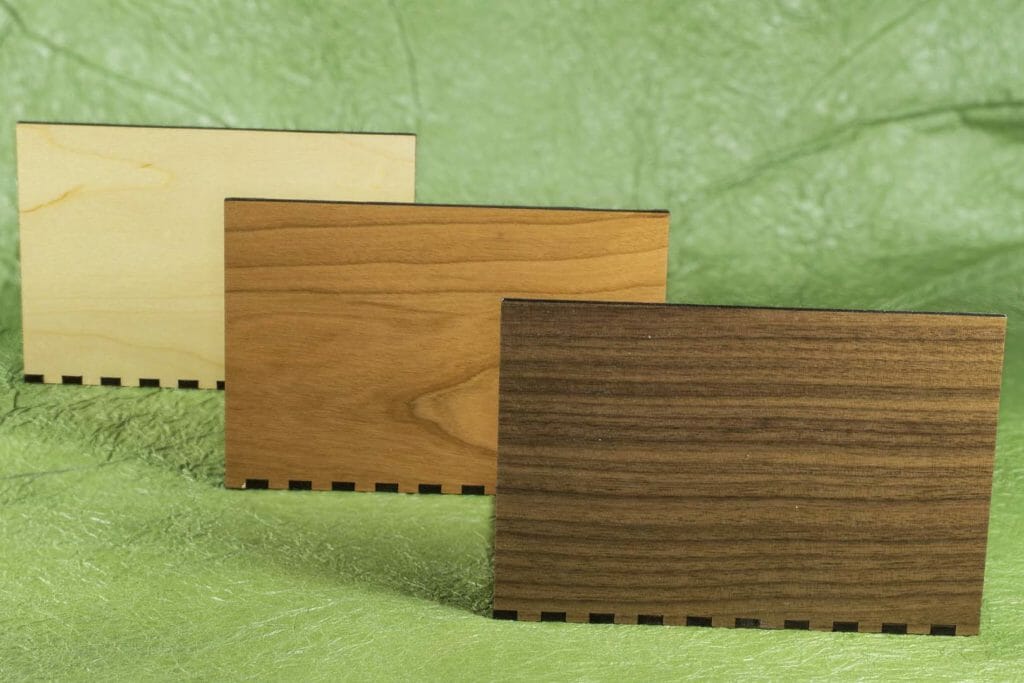
The latest prototype pop up card stands! Made from maple, cherry and walnut ply, a magnet-reactive coating on the inner surface allows small neodymium magnets to hold a card in place.


Magnetic hardwood pop up card stand
Magnetic hardwood pop up card stand.


Magnetic hardwood pop up card stands in maple, cherry and walnut.


Westward Ho Origamic Architecture Pop Up Card

Westward Ho Origamic Architecture Pop Up Card by Andrew Crawford

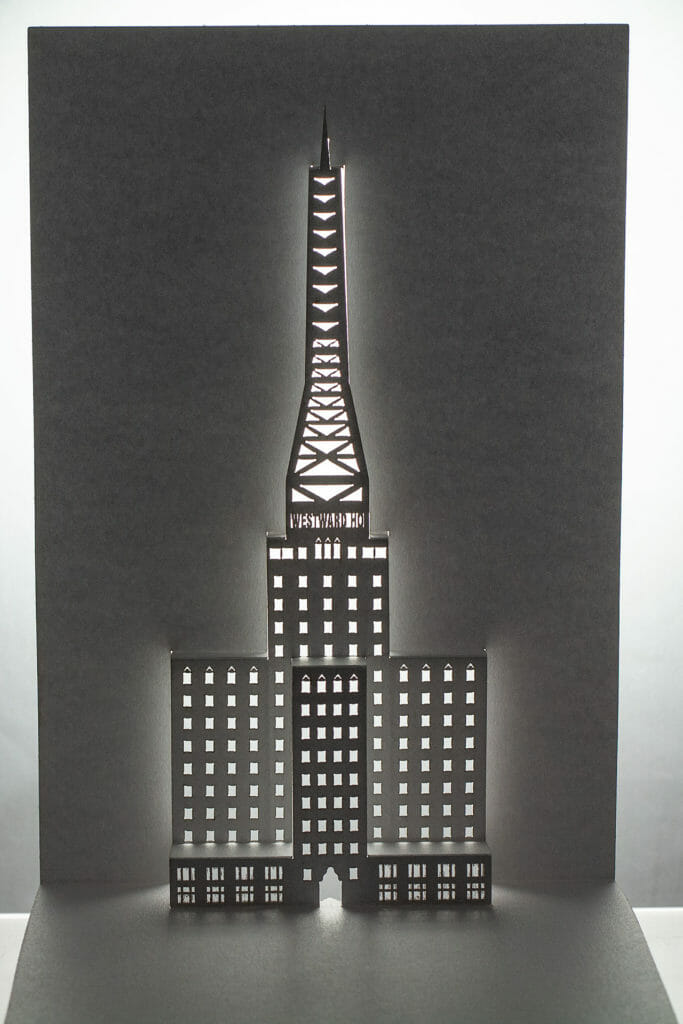
There have been a lot of changes in downtown Phoenix in the last few years. A lot of history remains. I thought it would be fun to make a pop up design of a local building or two. So, I had a go at the Westward Ho.

The Westward Ho is a landmark of downtown Phoenix. The hotel with office space and restaurants was built in 1928 and, remained the tallest building in Arizona until 1960. The steel tower and antenna were added in 1949 to broadcast the first television station in Phoenix. The building was converted to housing for the elderly and mobility-impaired in 1980.

Westward Ho Origamic Architecture Pop Up Card by Andrew Crawford

Keyboard.io Logo Twisted Crest Pop Up Card

Keyboard.io Logo Crest OA

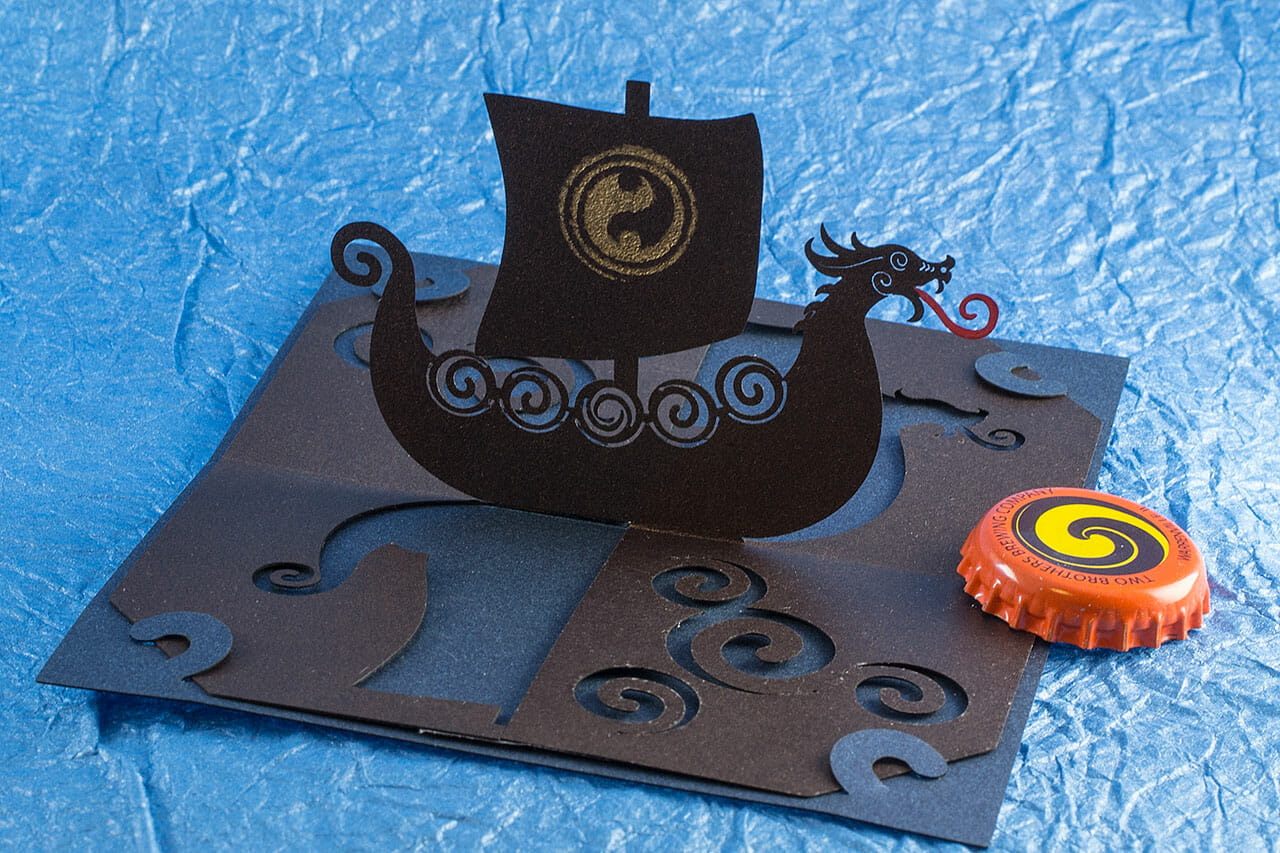
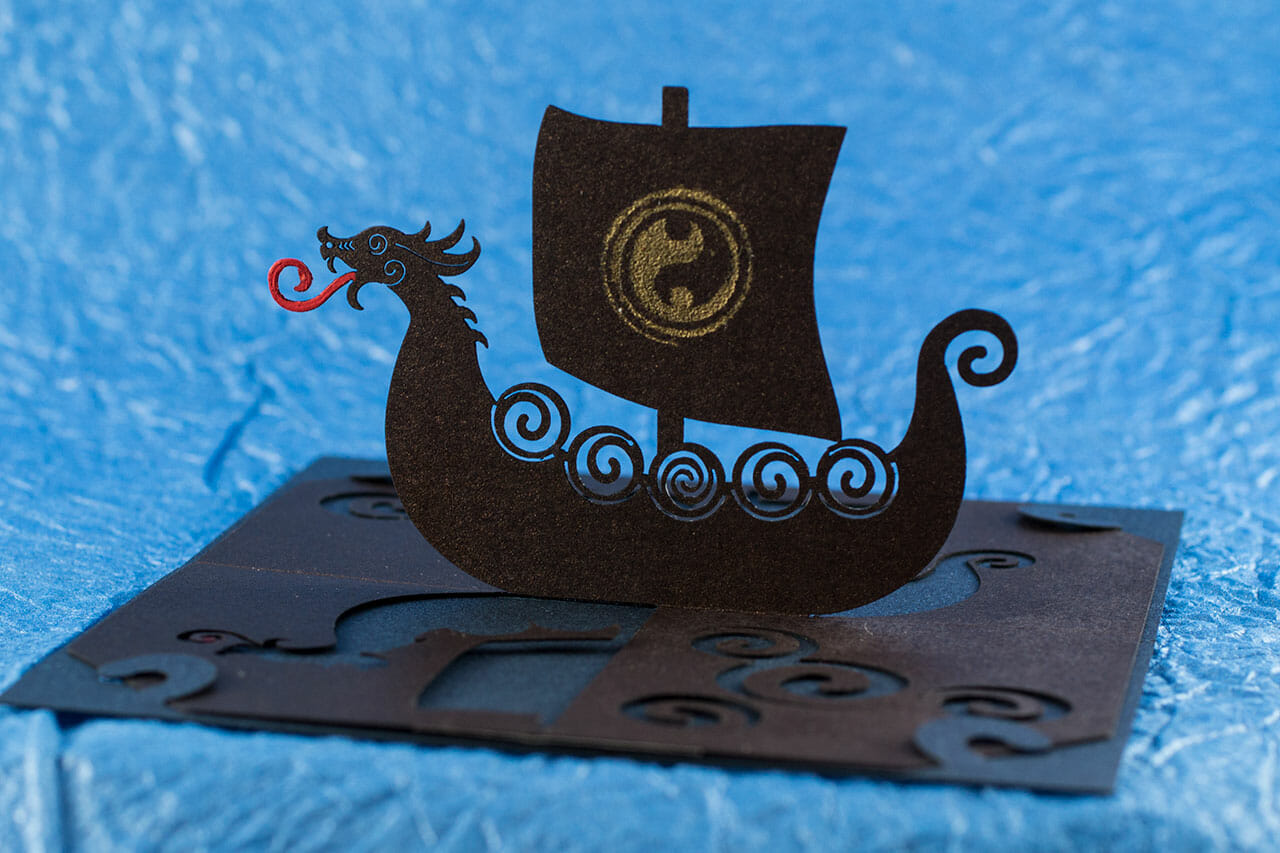
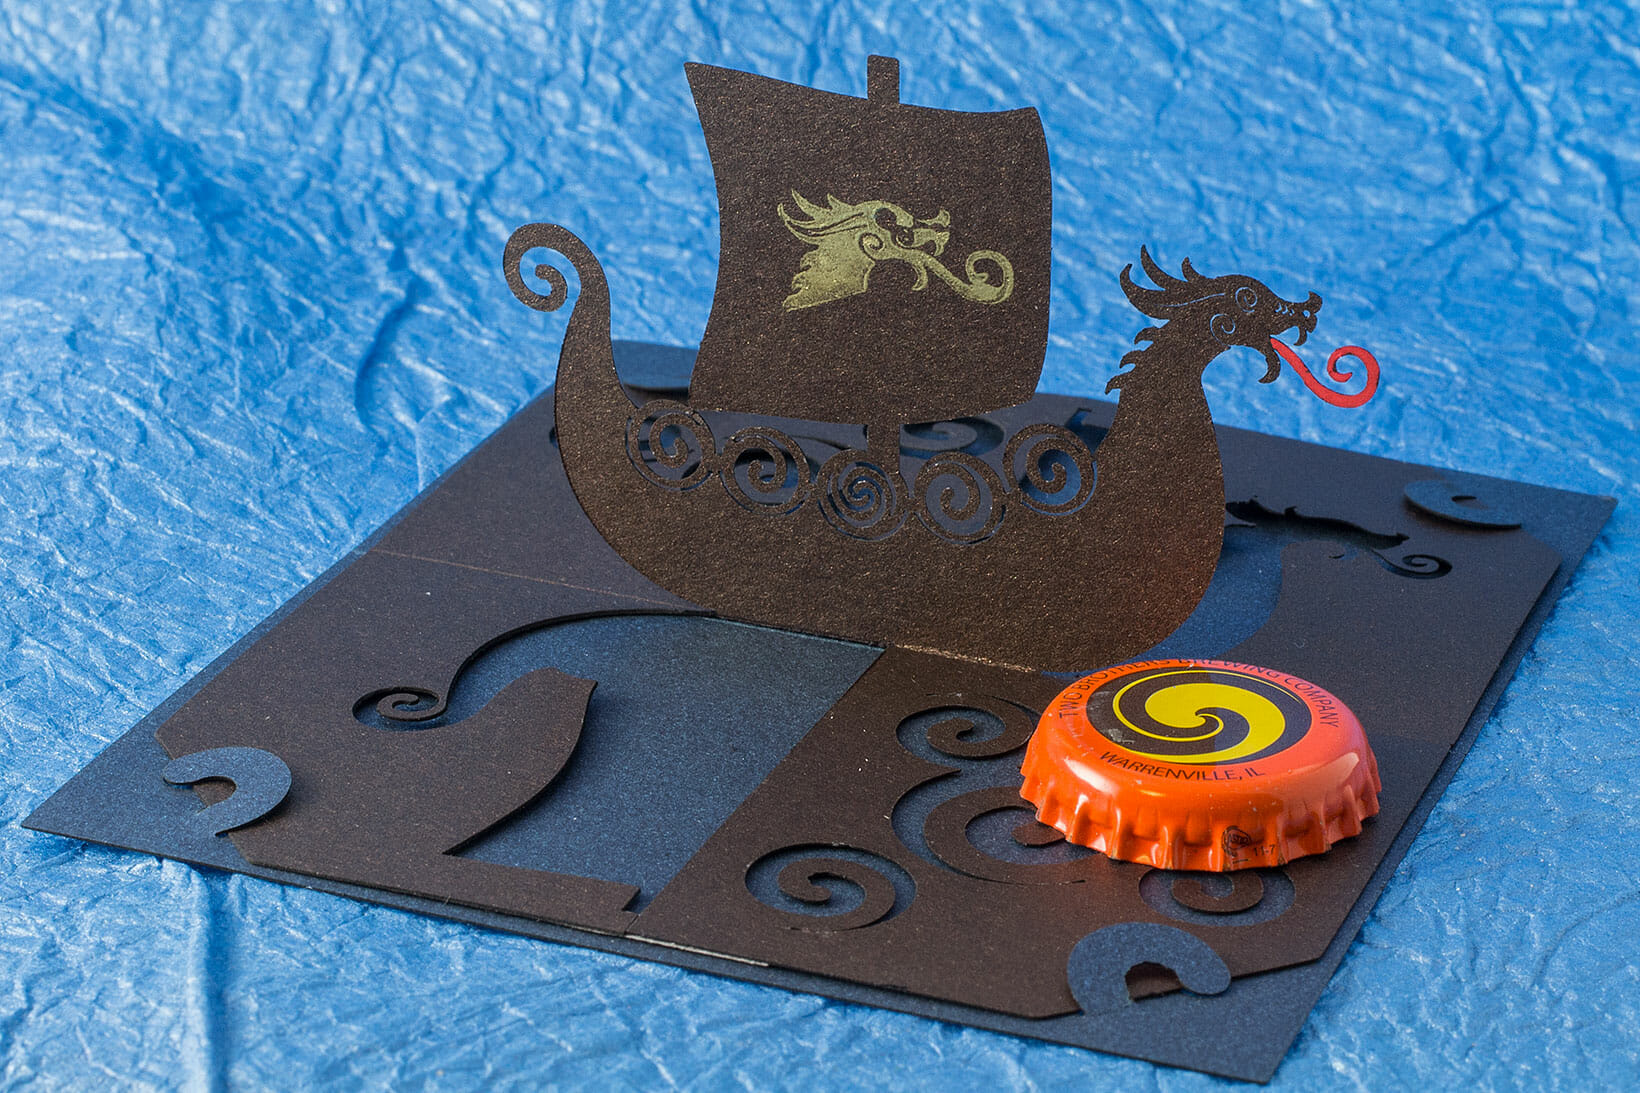
Another one of the twisted-crest style origamic architecture pop up cards I did early last year. This is modeled on the logo for Keyboard.io, which makes a really great heirloom-grade ergonomic keyboard (the Model 01). This one was done on the new Glowforge, which made some of the finer details a lot easier.

Keyboard.io Logo Crest OA
Keyboard.io logo 180-degree open twisted crest origamic architecture pop up card.
Keyboard.io Logo Crest OA
Keyboard.io logo 180-degree open twisted crest origamic architecture pop up card.

Make a 180º Open Twisted Crest OA/Kirigami Pop UP Card

Flower 180º Open Twisted Crest Pop Up Card
Flower 108º Open Twisted Crest Pop Up Card

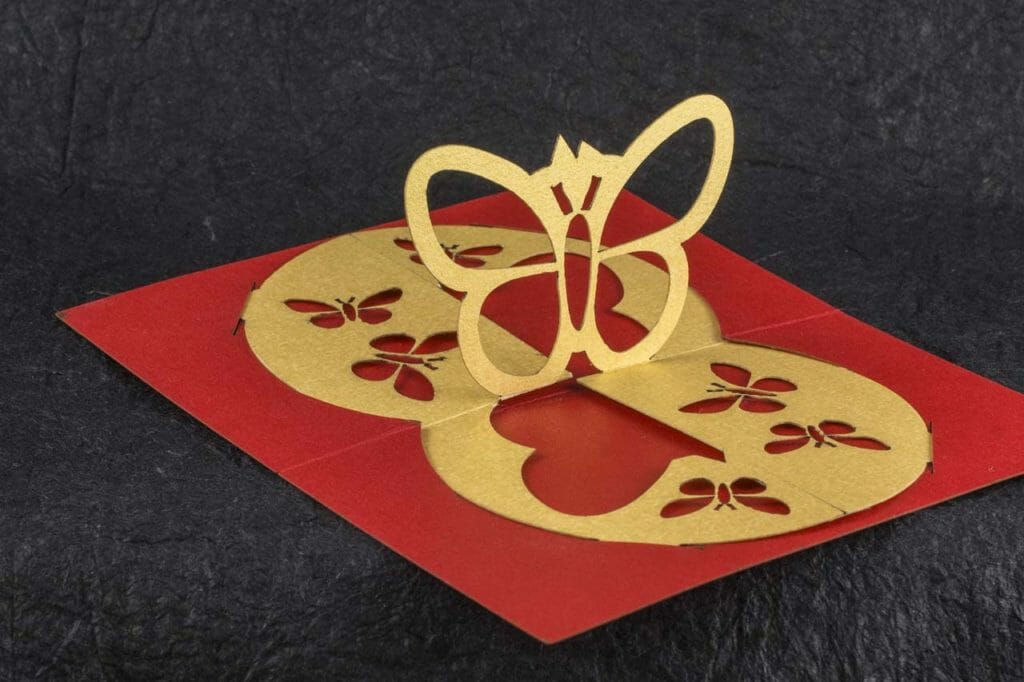
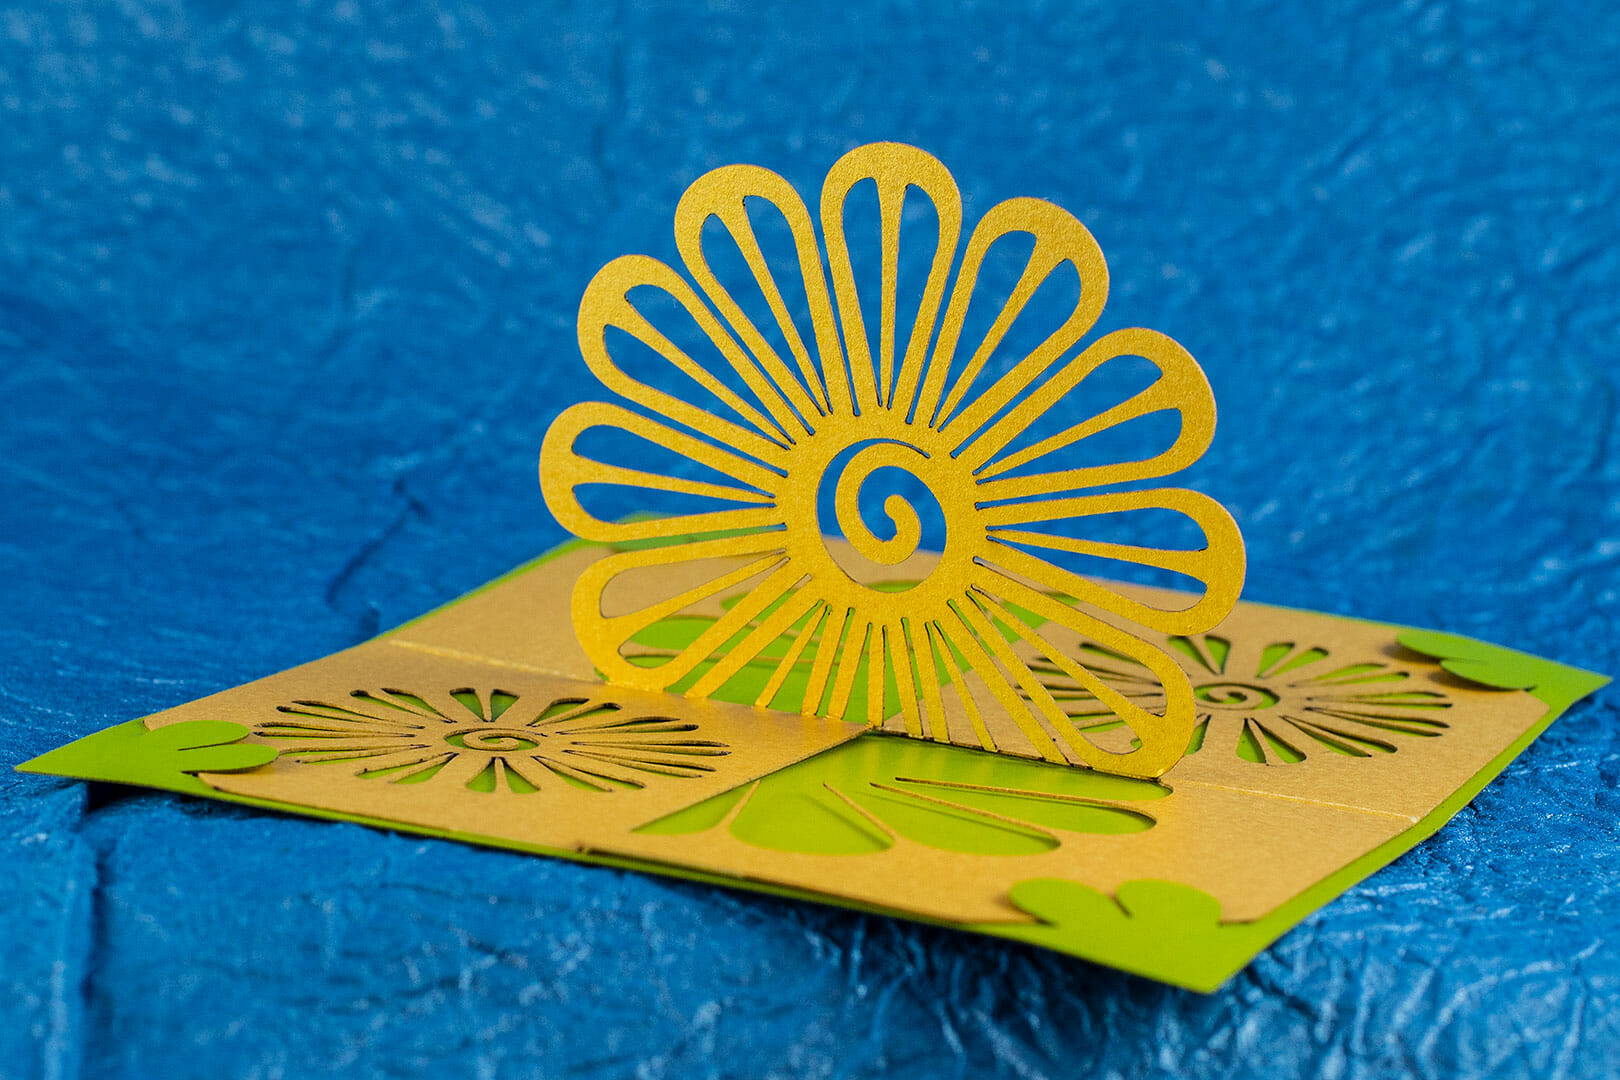
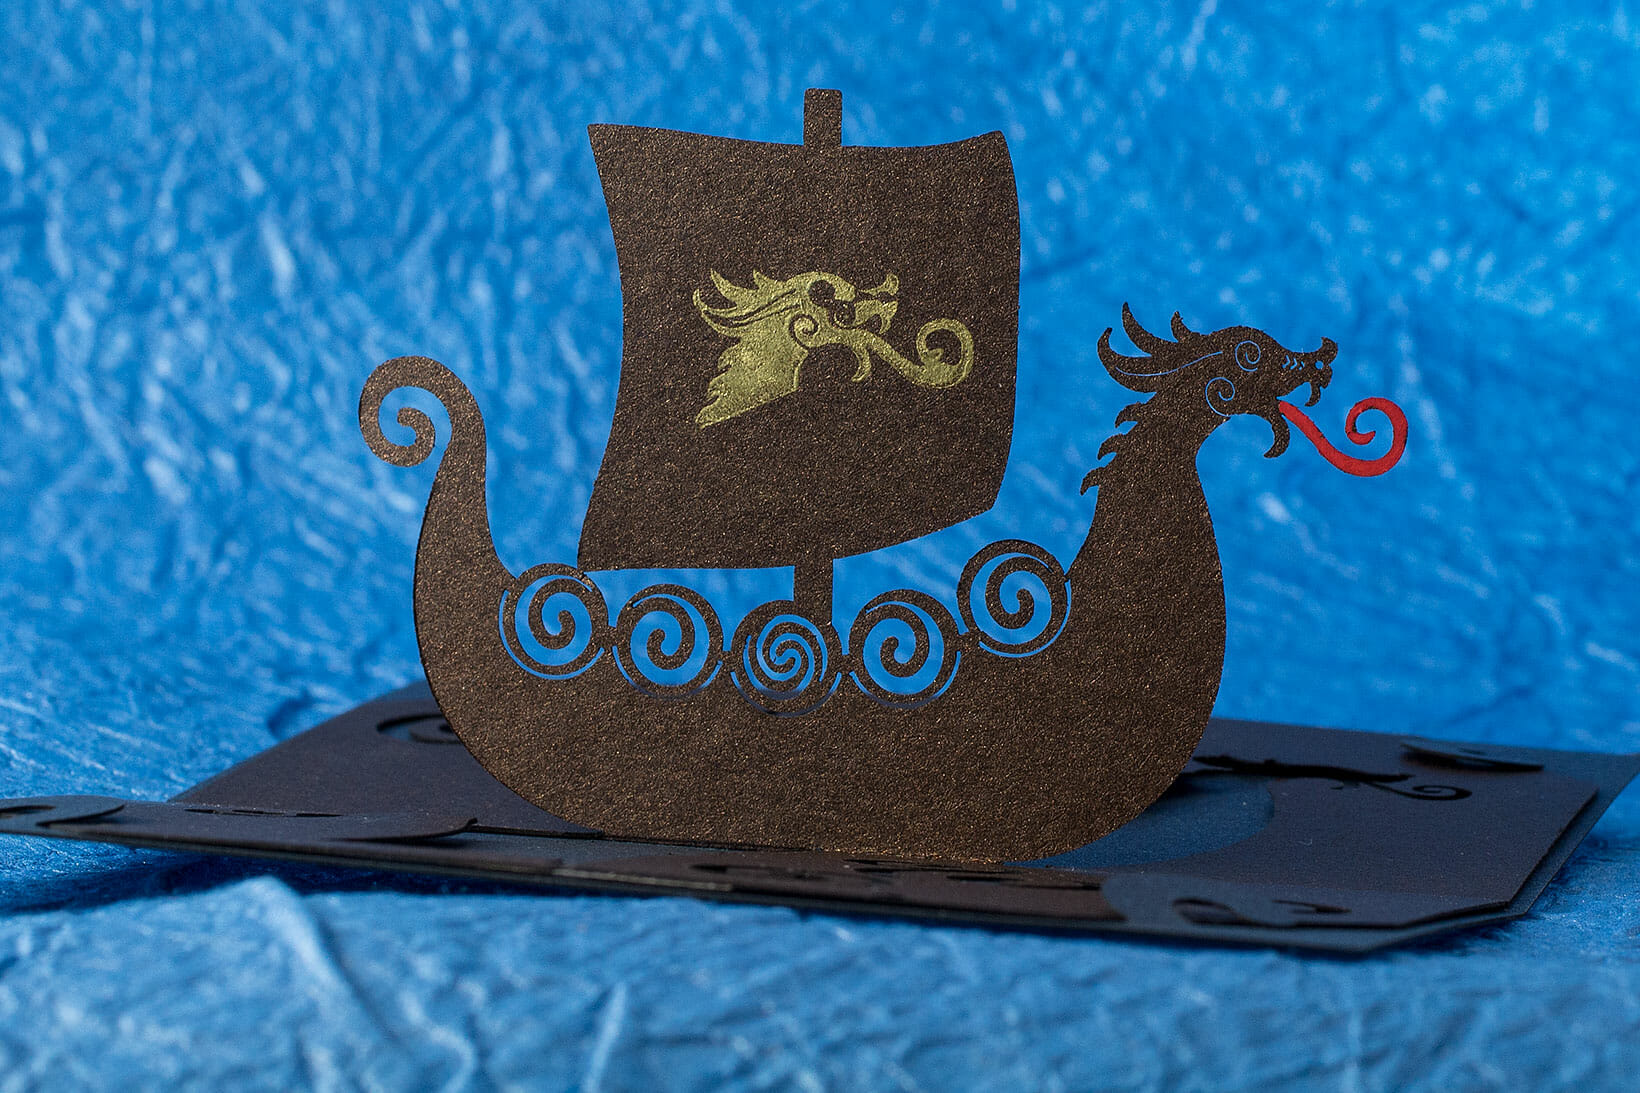
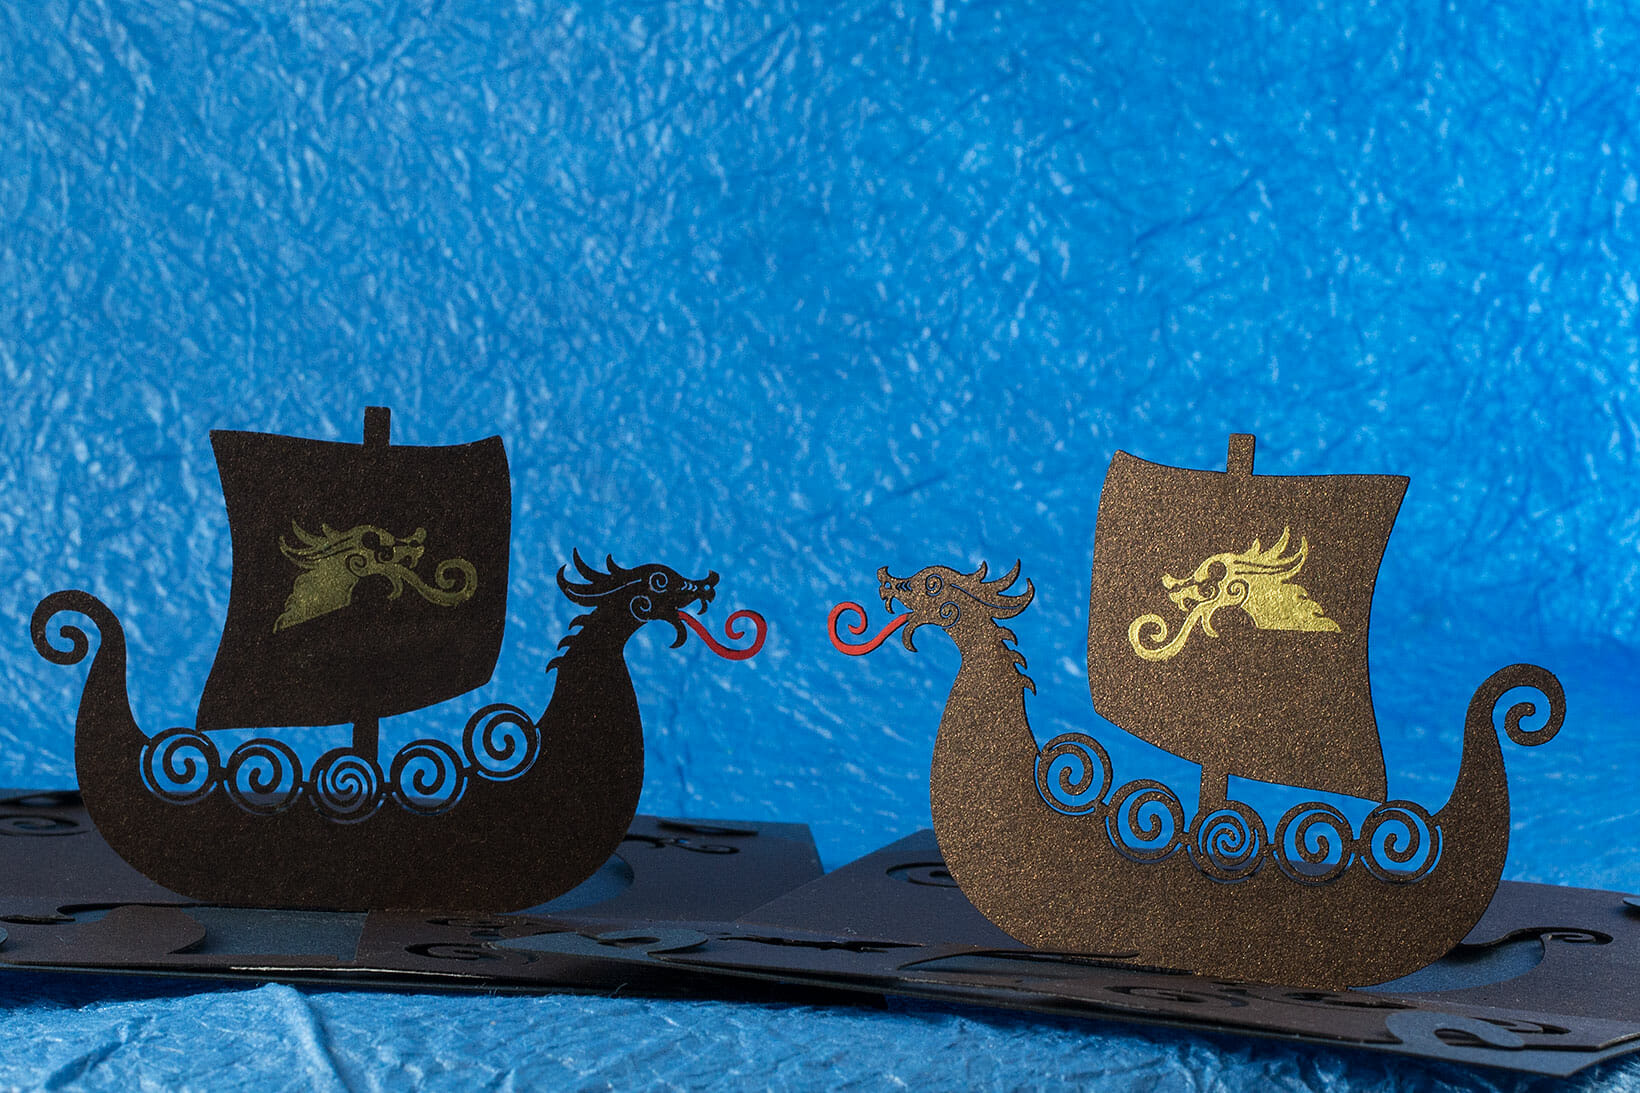
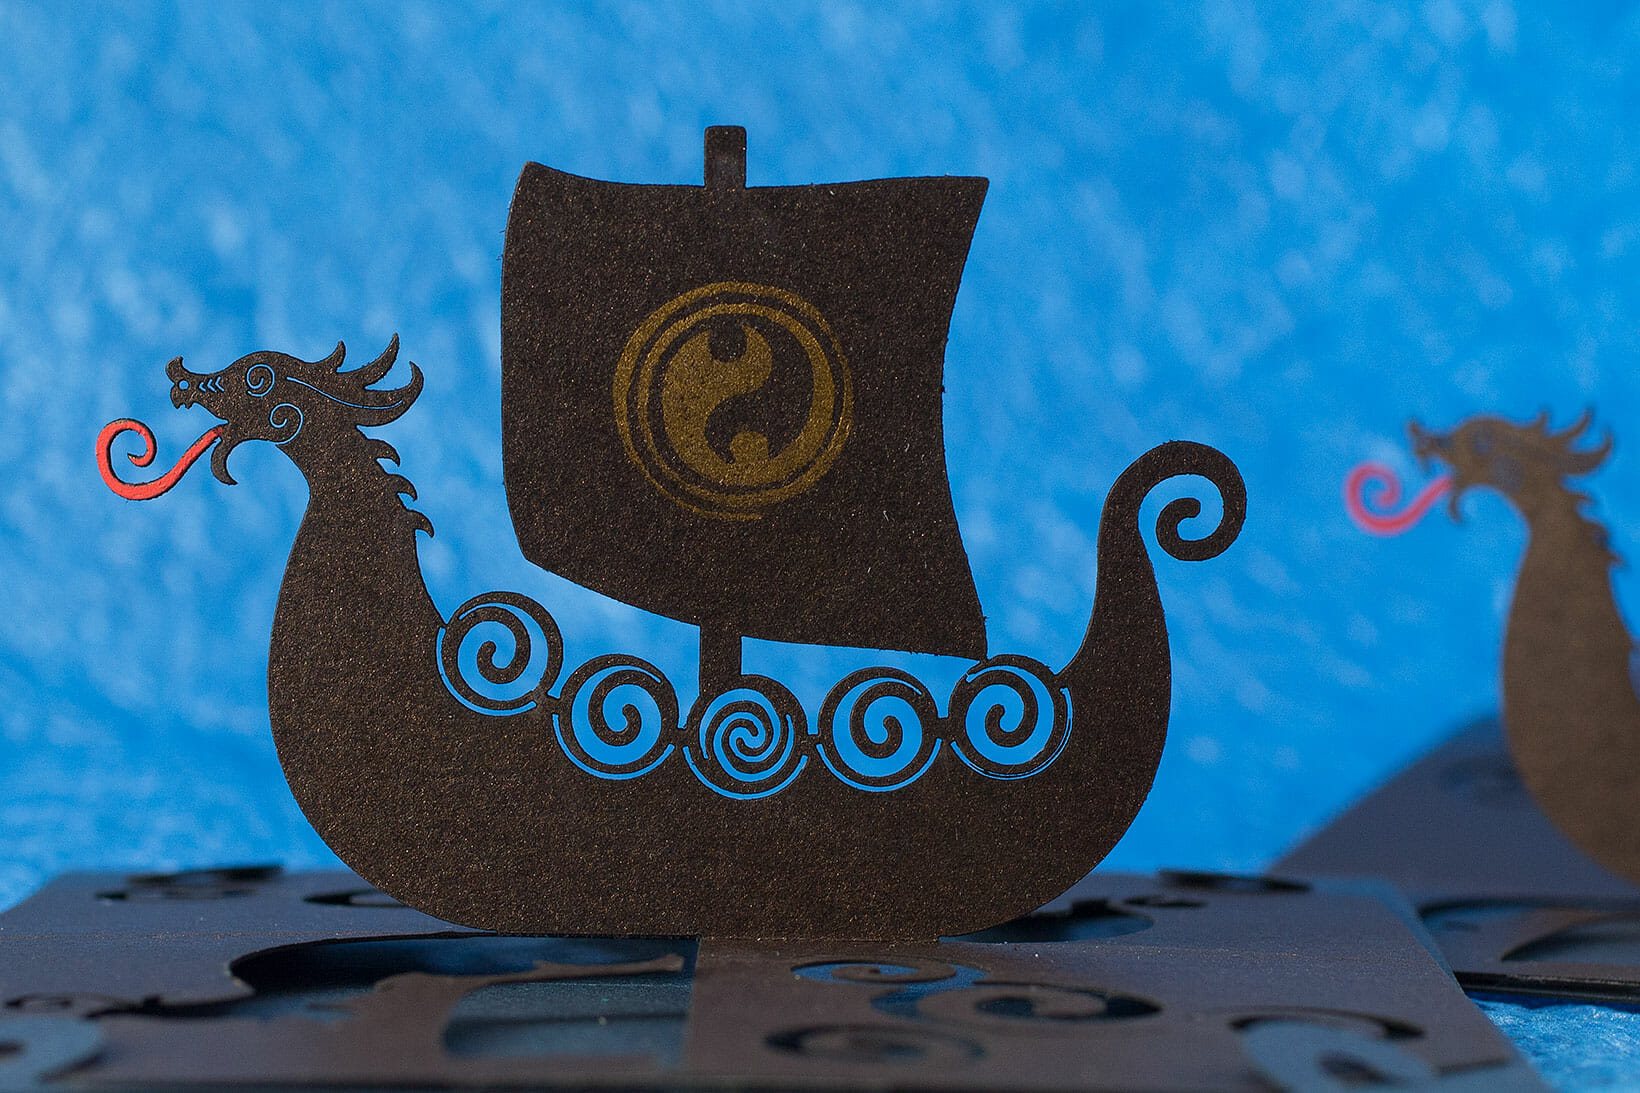
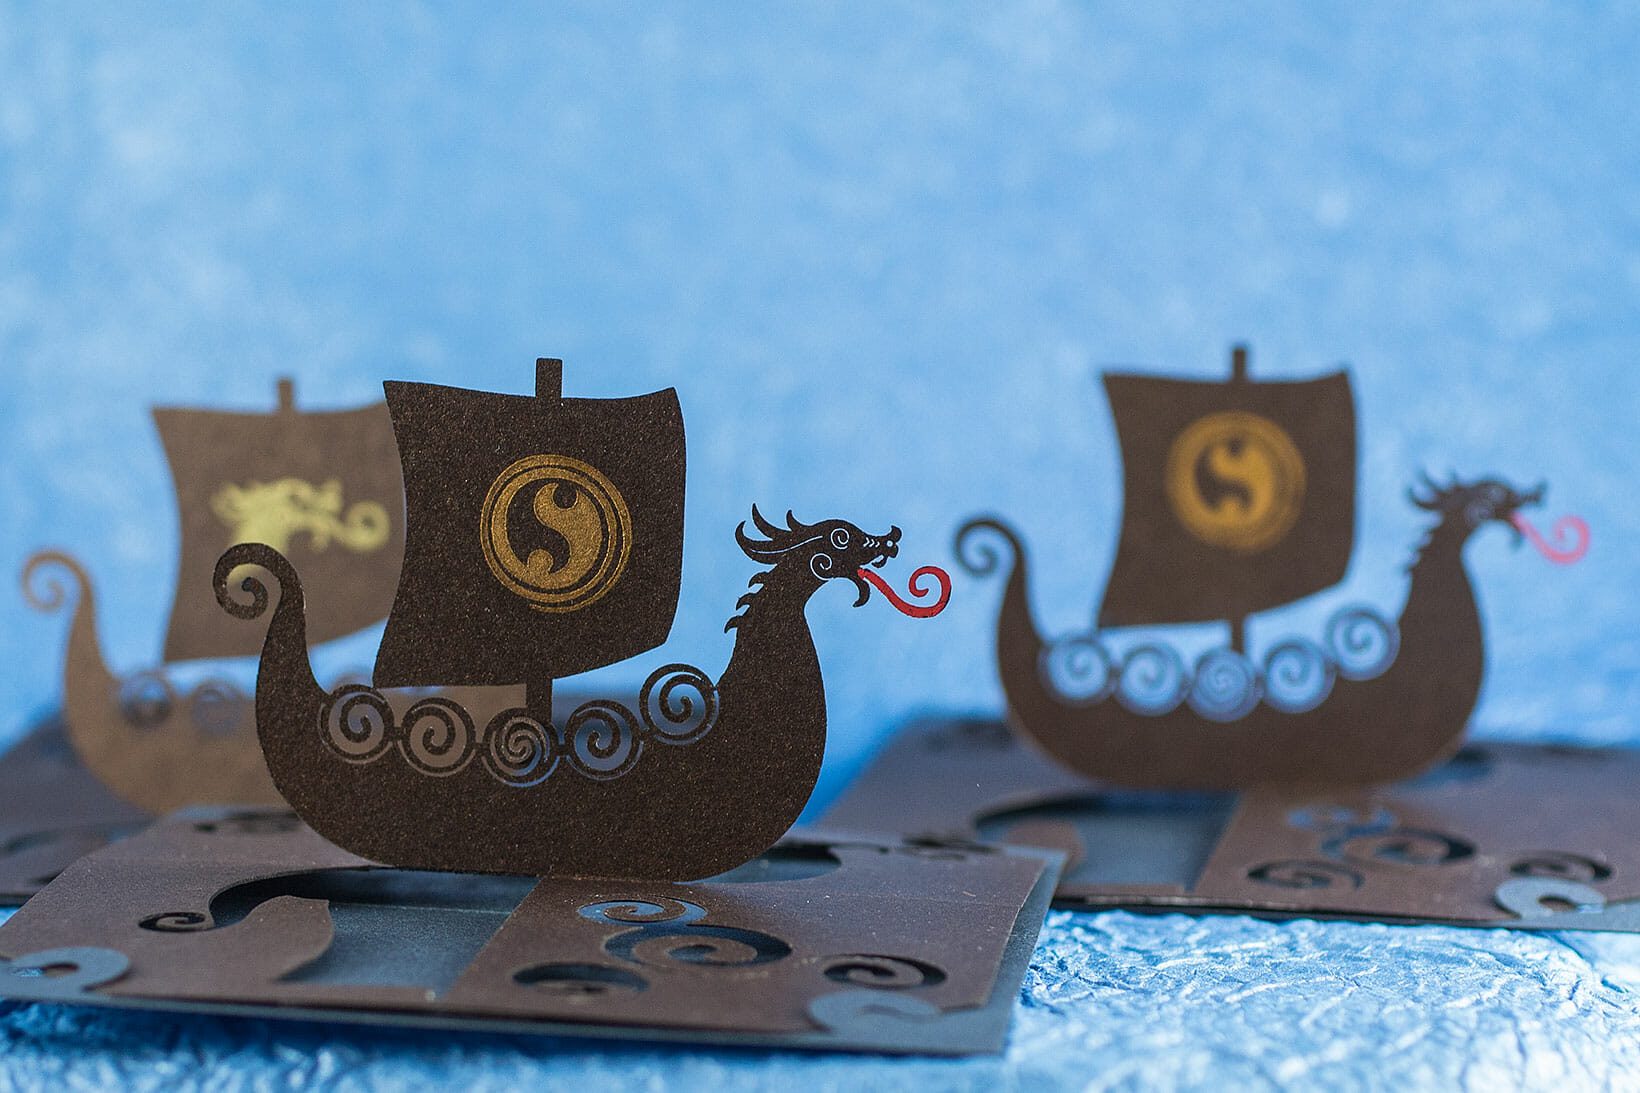
I have been having fun making these 180º open twisted crest style origamic architecture pop up cards. This is a clever technique and, I wanted to invite you to join in the fun.  This post includes patterns for my new Flower Crest design, suitable for production on a laser cutter, a craft CNC cutter or, by hand.

Most people will have to actually make one of these cards or watch the folding video to get how it works.  I originally spotted this technique used for several patterns in Keiko Nakazawa’s 2006 book 3D Pop-Up Greeting Cards (link in the resources section below) and, abstracted it to make my own designs. Rather than gluing to backing cards, I prefer to develop other approaches like what I have done here.

Flower Crest OA Backing Card Pattern

Flower Crest OA Card Pattern

Machine Settings

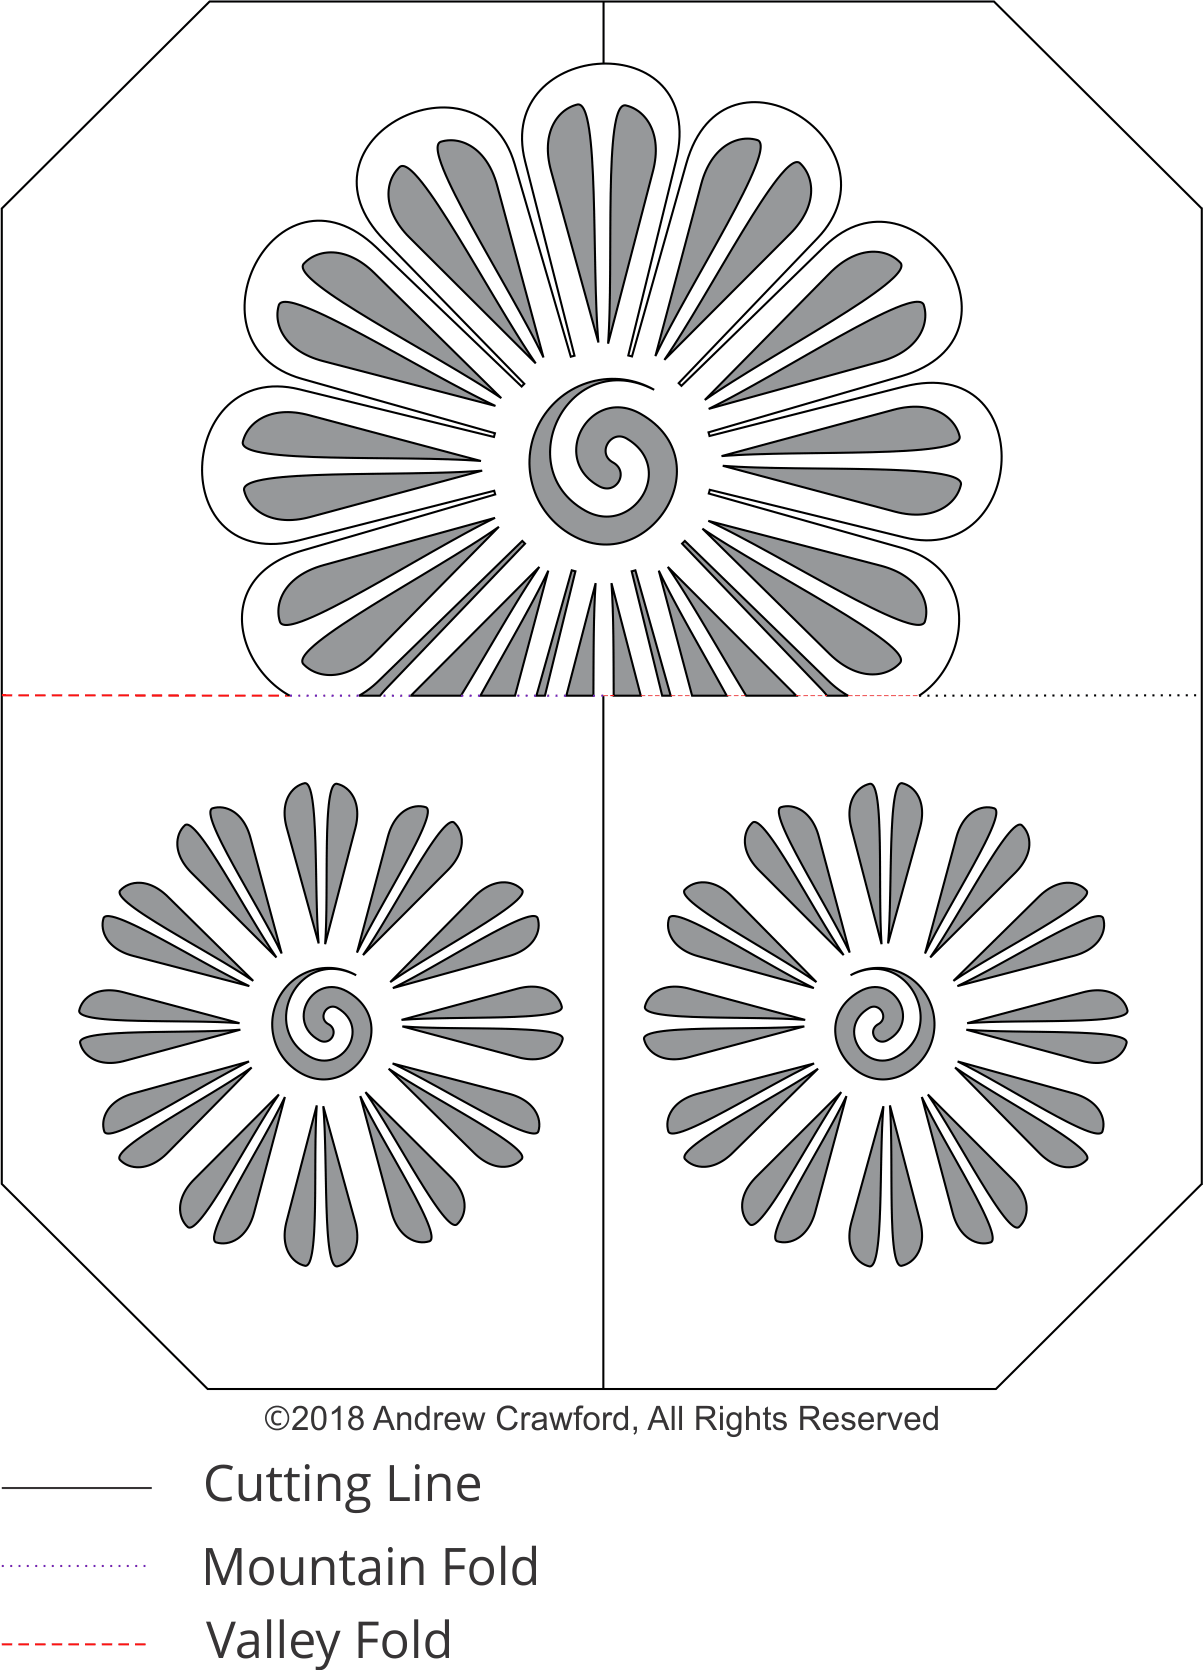
Settings for your cutting machine, whether CNC or laser, will vary depending on your machine, the specific paper stock you are using and other factors.

The paper I used for my cards was 0.014″ thick 105lb cover stock.

On the Glowforge, I used a speed of 500 and power of 72 for the cut lines and a power of 18 for the mountain fold lines.  I scored the valley fold lines on the back by hand with a craft knife.  If you are a Glowforge user, you likely have some experience dialing in settings for a particular material. I color-coded the file so that the GFUI will separate and order the operations on import.

27 July 2019 update: I’m seeing less smoke deposition with lower power and slower speed.  I have switched to using 250 speed and 36 power.

My settings for each operation for the Gazelle cutter are in the MTC file as layer descriptions (D is depth setting on my adjustable blade holder, V is velocity and F is force). Those will probably be mostly useless unless you are also using a Gazelle cutter with an adjustable blade holder.  If you are a craft cutter user, you are likely used to sorting out settings for a given stock.  The layers are in the order you should cut them.  The last two layers are the backing card (one score and the cuts).

Pattern Files

Important: These files are for personal, non-commercial use only.  If you want to produce these to sell or for other business use, please contact me to arrange for licensing terms.

Attribution-Creative Commons NonCommercial-ShareAlike

Flower Crest Pop Up Card PNG (for cutting by hand)

Flower Crest Backing Card PNG (for cutting by hand)

Flower Crest Pop Up Card SVG (optimized for Glowforge)

Flower Crest Backing Card SVG

Flower Crest Pop Up Card MTC (for craft cutters)

Resources

MT Washi Masking Tapes, Set of 20, Bright & Cool Colors

(Also available in bright and cool half sets.)

Lil Chizler scraping tool

3D Pop Up Greeting Cards by Keiko Nakazawa

Glowforge Laser Cutter

Amazon referral links support a local arts organization. Glowforge referral link helps defray my costs of running the studio.

Viking Longship Origamic Architecture Card

Viking Longship Origamic Architecture Pop Up Card

This Viking longship OA/kirigami pop up card was some time in the making. I’m quite happy with it, especially the dragon head.

I made four custom rubber stamps for imprinting the sails (two dragons and two spirals, one for each orientation). The metallic ink takes a long time to dry (like a month). So, I embossed them with clear embossing powder and a heat gun. The tongue is painted red. Lots of fragile bits on these. So, they required careful handling.