Quick Celtic Key Square Print

")
I made some quick-and-dirty Celtic key square relief prints with a rubber plate engraved on the laser.
Here is a video with the whole printing process.

I made some quick-and-dirty Celtic key square relief prints with a rubber plate engraved on the laser.
Here is a video with the whole printing process.


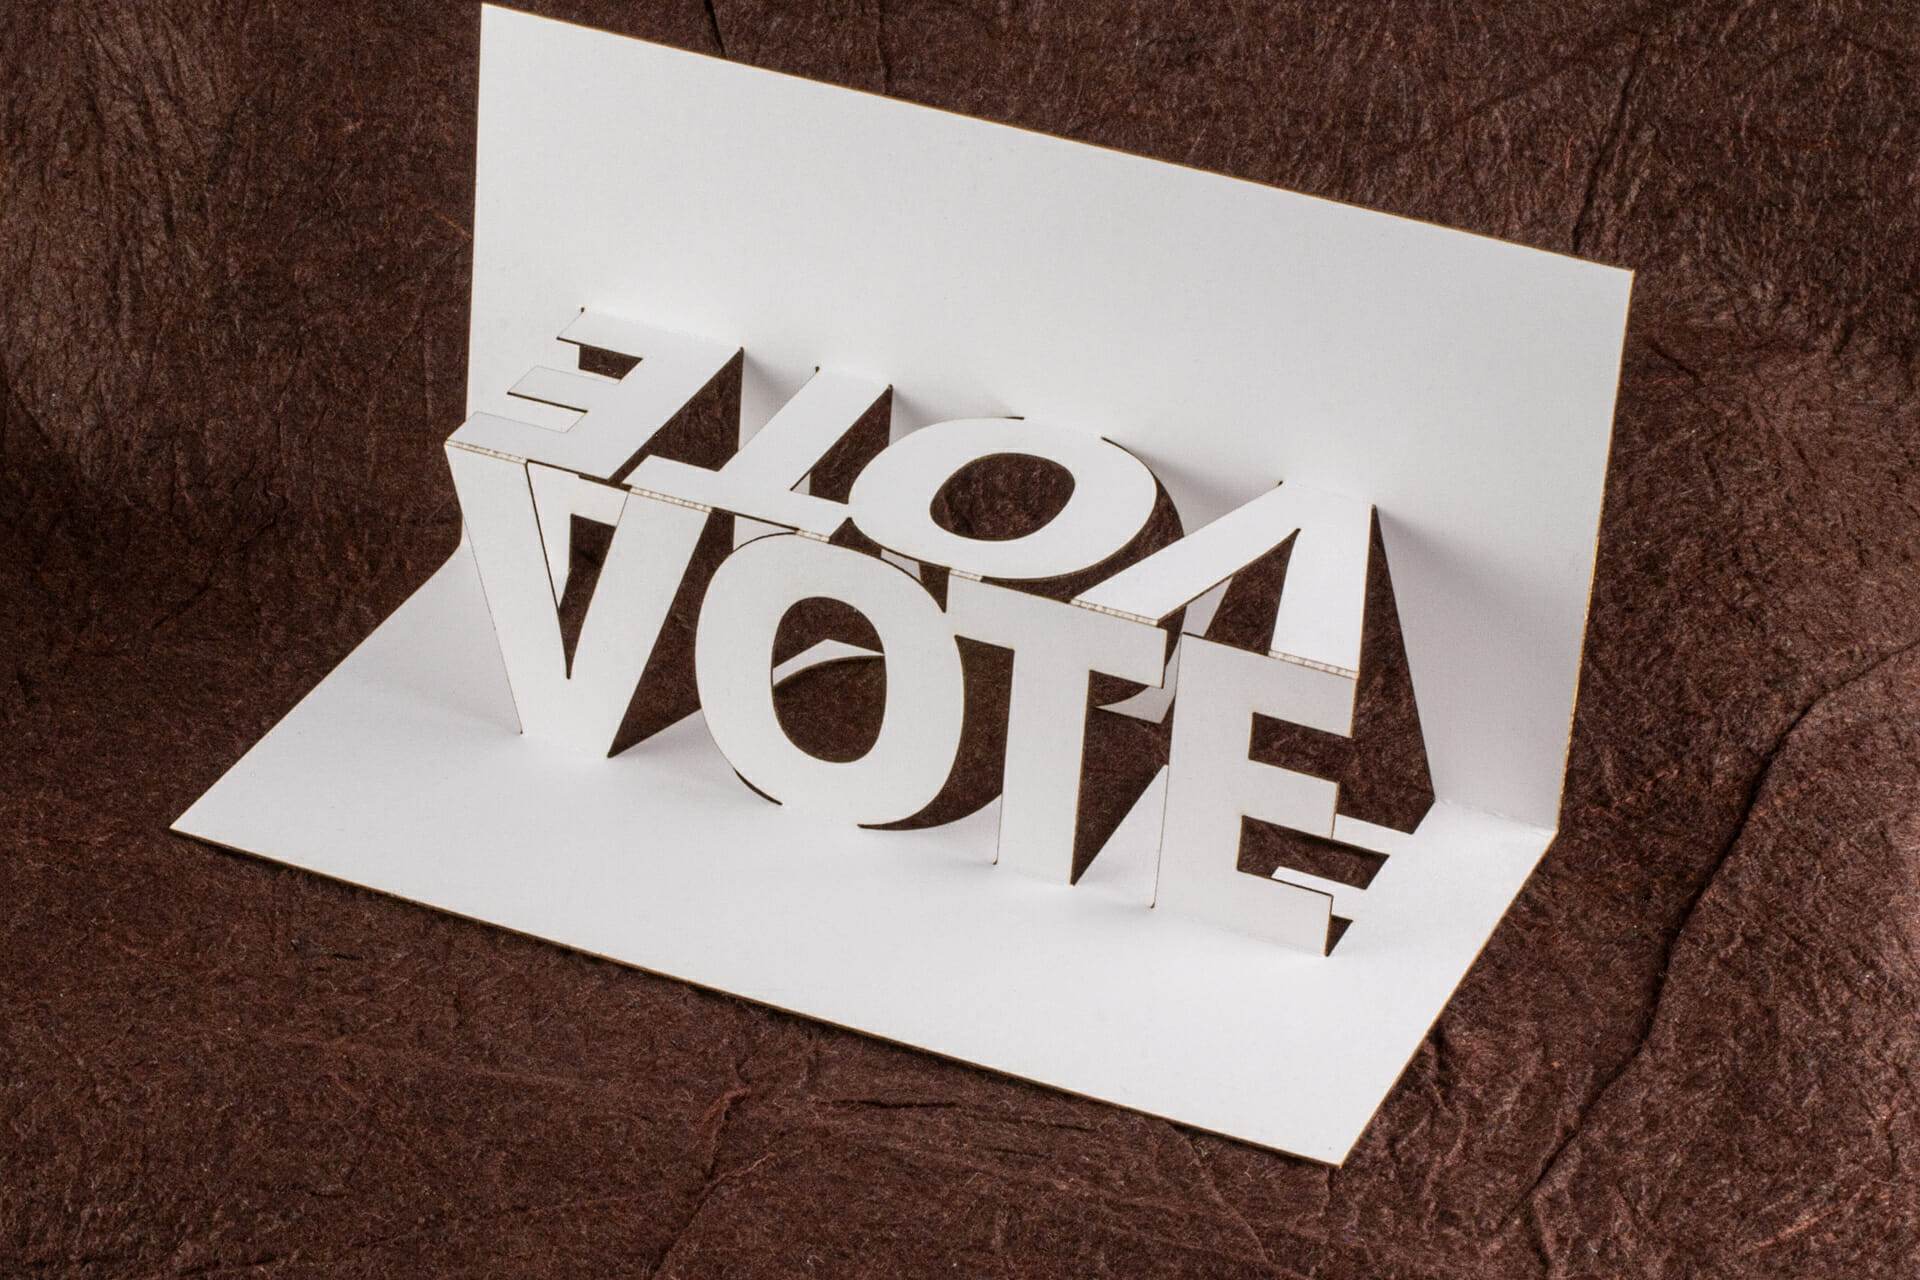
There is a big event going on in the United States right now.
If you would like to make your own, you can download the Pop the Vote pop up card pattern for free.

Just open this twisted crest origamic architecture / kirigami card and … you’ll be meeting Totoro!
Continue reading


")
")
Something I noticed pretty quickly with my new Oculus Quest VR headset is that it slips forward very easily, especially during the sort of very active games I got it to play. It is pretty front-heavy. So, some ballast on the back strap helps quite a bit.
I taped a battery pack I had on-hand to the back strap with gaffer tape to confirm that it helped with the issue. I decided I really wanted something a little more elegant, though. So, I designed and made this battery ballast pouch.
If you want to make one of these, the files are all linked below, along with instructions and a build video.
There are two pattern files: one for cutting the pouch from the faux leather and, one for the rigidity insert.
The purple square is where you would put any graphic you wanted on the flap. You could actually use all of the horizontal space to the edges of the flap, if you wanted. Anything farther towards the body (down) will bend over the top of the battery, though.
For engraving the JPP Saddle Collection faux leather on the Glowforge, I used 1000 speed, 30 power and 225 LPI. You are on your own for figuring out settings for other equipment.
Everything else in the pattern is cut using 245 speed and 60 power.
I cut the 1/8″ acrylic for the rigidity insert with the usual Proofgrade settings on the Glowforge.
These files are for personal, non-commercial use only. If you want to produce these to sell or for other business use, please contact me to arrange for licensing terms. Also note that, by referencing these, you are agreeing to release any variations you create under identical terms.


I recently got an Oculus Quest VR headset to help encourage me to do some more cardio activity through the long Phoenix summer. Looking at it sitting on the floor for a couple days made me realize it really needed a better place to be when not in use. It needed to be near enough to a power outlet to charge and, convenient enough to just grab it and use. I keep it in a room where I exercise and practice my taiko. So, there is not a lot of furniture. A wall mount seemed like a good choice.
Nothing I found online really looked like what I wanted, though. I have some 1/4” acrylic that is tinted with green in a way that gives a solid impression of glass. So, I thought I would try making a wall mount from that.
You can see the result in the photos here and, in the video.
If you want to make one of these, the files are all linked below.
The red-brown and purple outlines are the main cuts. I just used the standard Thick Acrylic Proofgrade settings on the Glowforge for those. I separated them out of habit for preferring to cut from the inside out.
The pale green rectangles are for position of the Command Strips, if you want to use those. You probably don’t want to cut or score them.
If you want to use screws to mount it instead, the gray circles would be engraved to an appropriate depth for the heads of the screws with the inner red circles cut through. These were set up for #6 screws. I didn’t go this route. So, you are on your own for the appropriate engrave settings. Ideally, you would run tests on a scrap. If you are not using screws, set these to ignore.
I cut the forms from Medium Draftboard. Any inexpensive 1/8” thick wood-based stock should work fine. Cut two sets from the file below. If you have a better idea for how to do this, let me know in the comments below or, send me a message.
The easiest way to understand making the bends is to watch the video. Basically, you want to localize the heat to where you want each bend as much as possible and, brace adjacent areas you don’t want bent or deformed to keep them from bending. Bending the main necks of the controller hooks before turning up the ends of the prongs is probably best. It is likely also easier to bend the controller hooks without the central hook being in the way of setting it down flat.
These files are for personal, non-commercial use only. If you want to produce these to sell or for other business use, please contact me to arrange for licensing terms. Also note that, by referencing these, you are agreeing to release any variations you create under identical terms.

Laser-cut cherry hardwood box with maple Celtic spiral inlay.
Continue reading
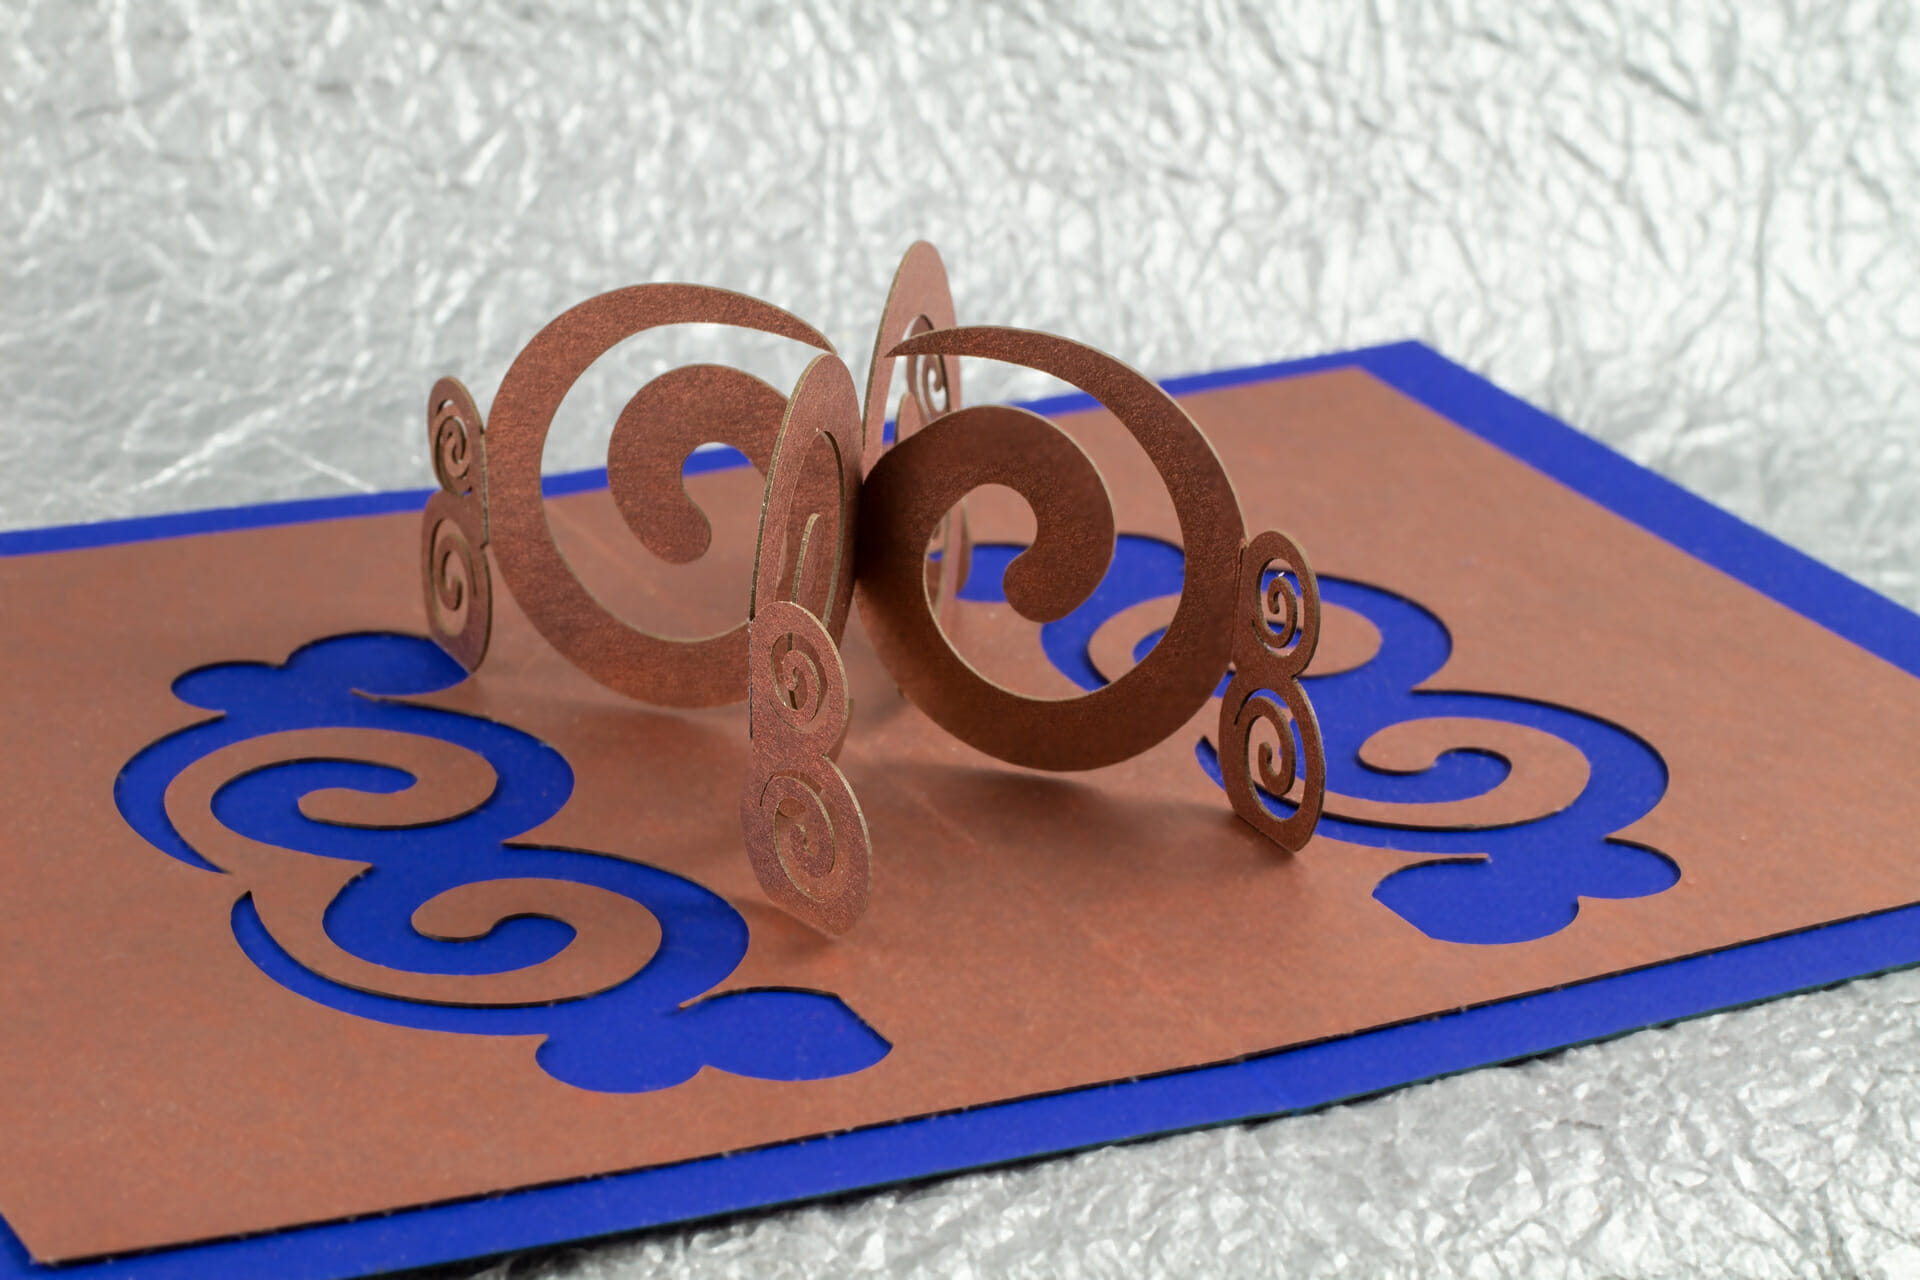
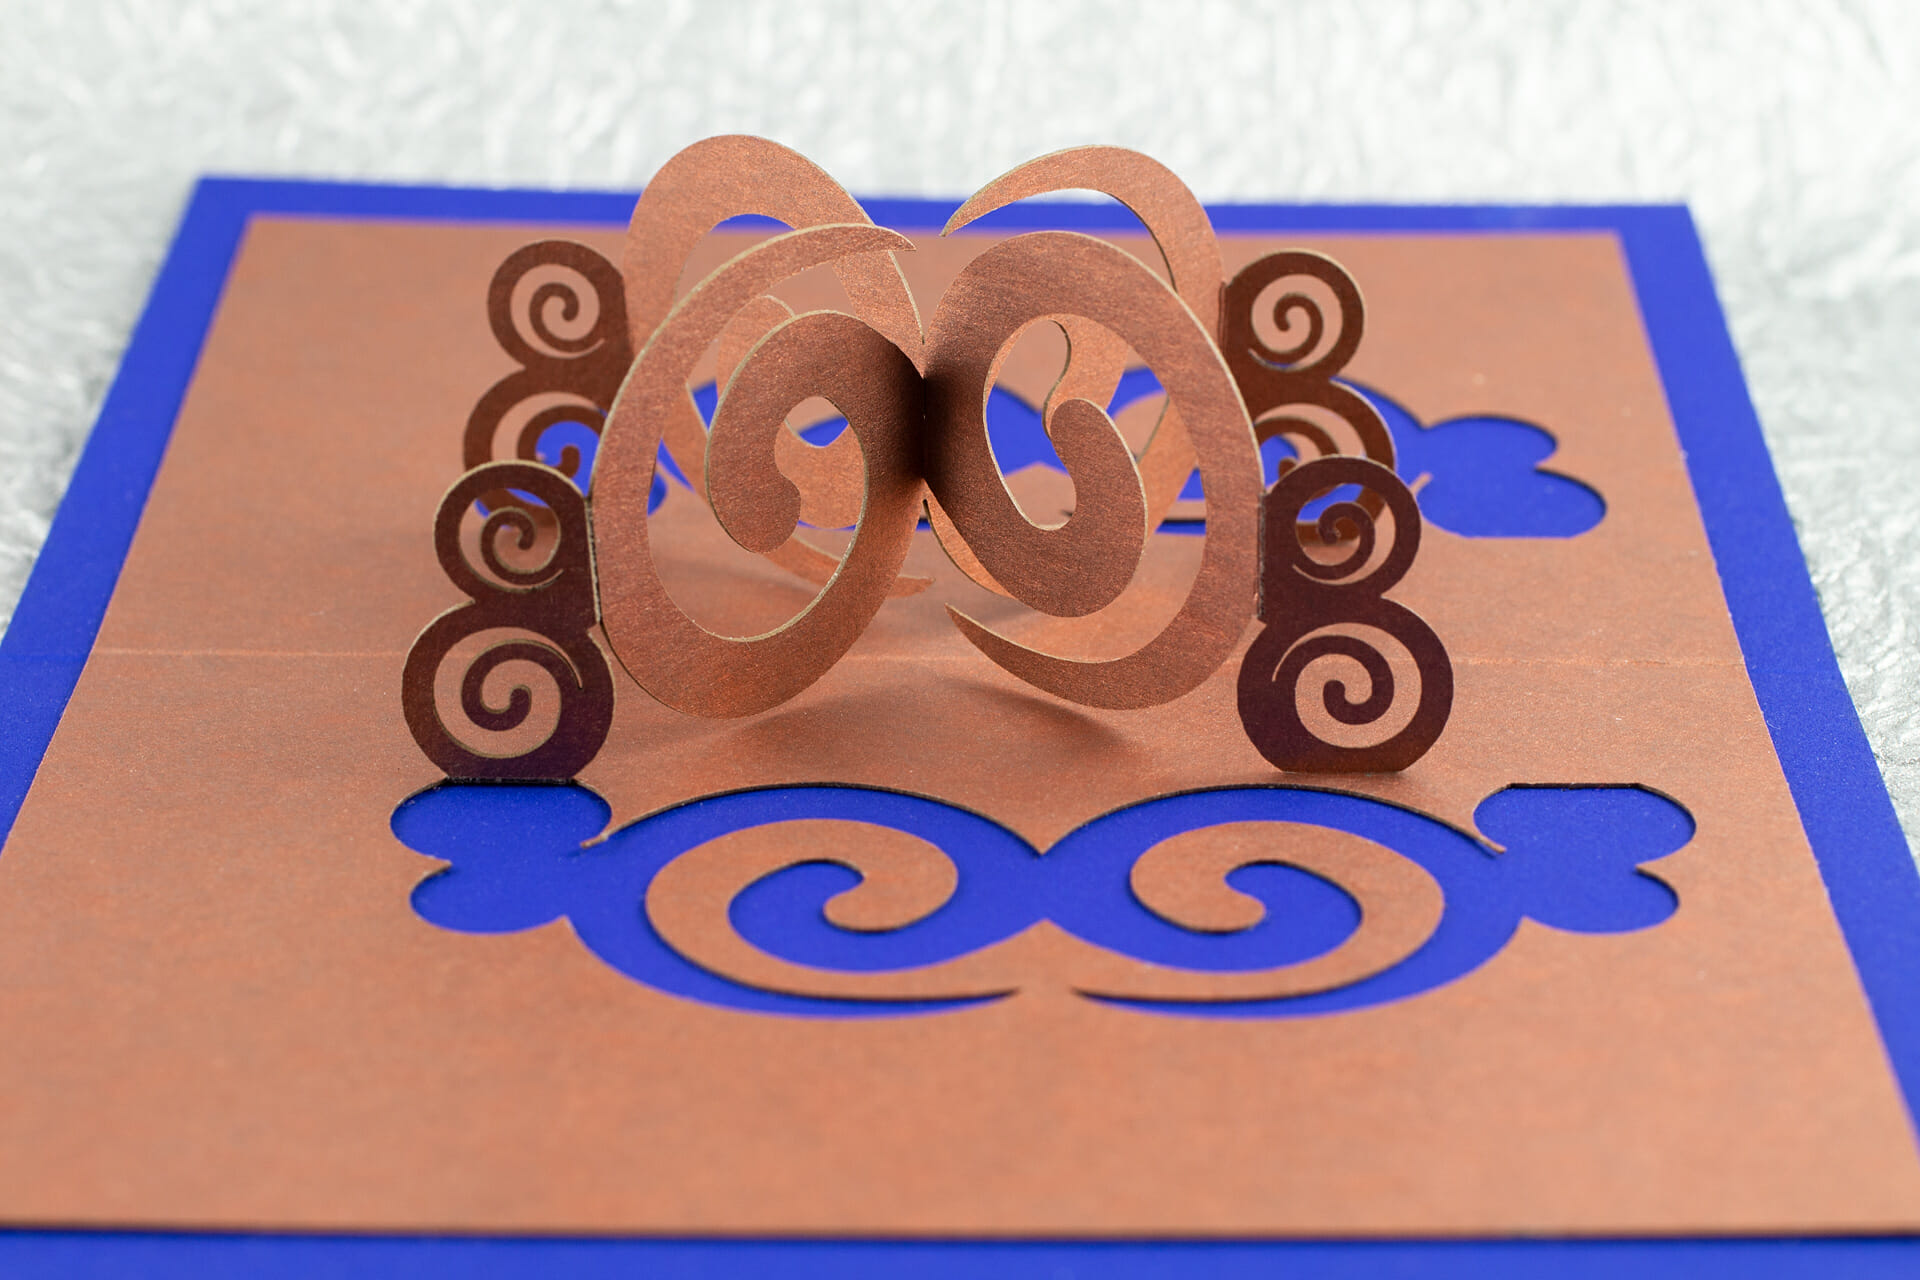
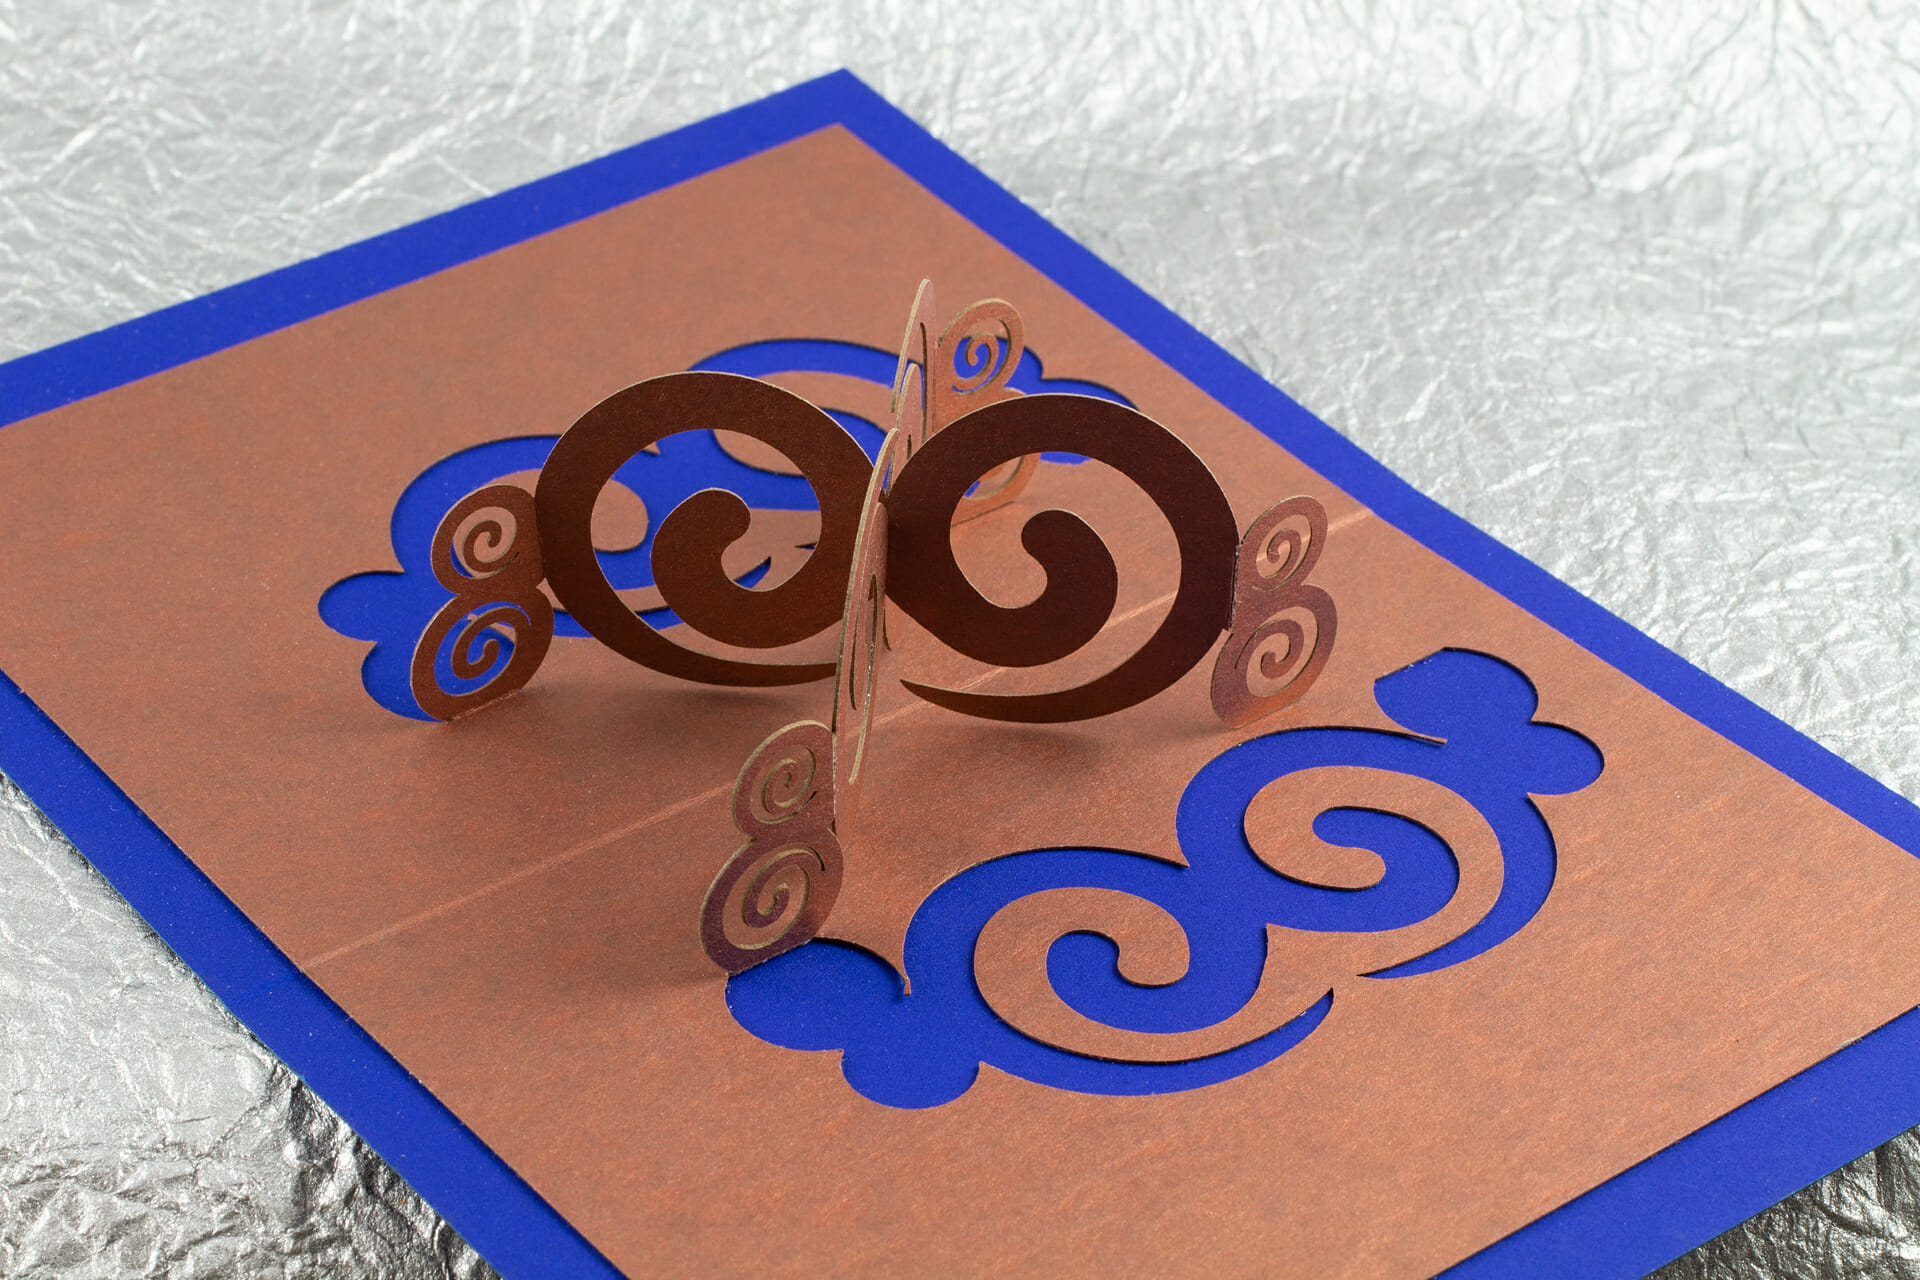
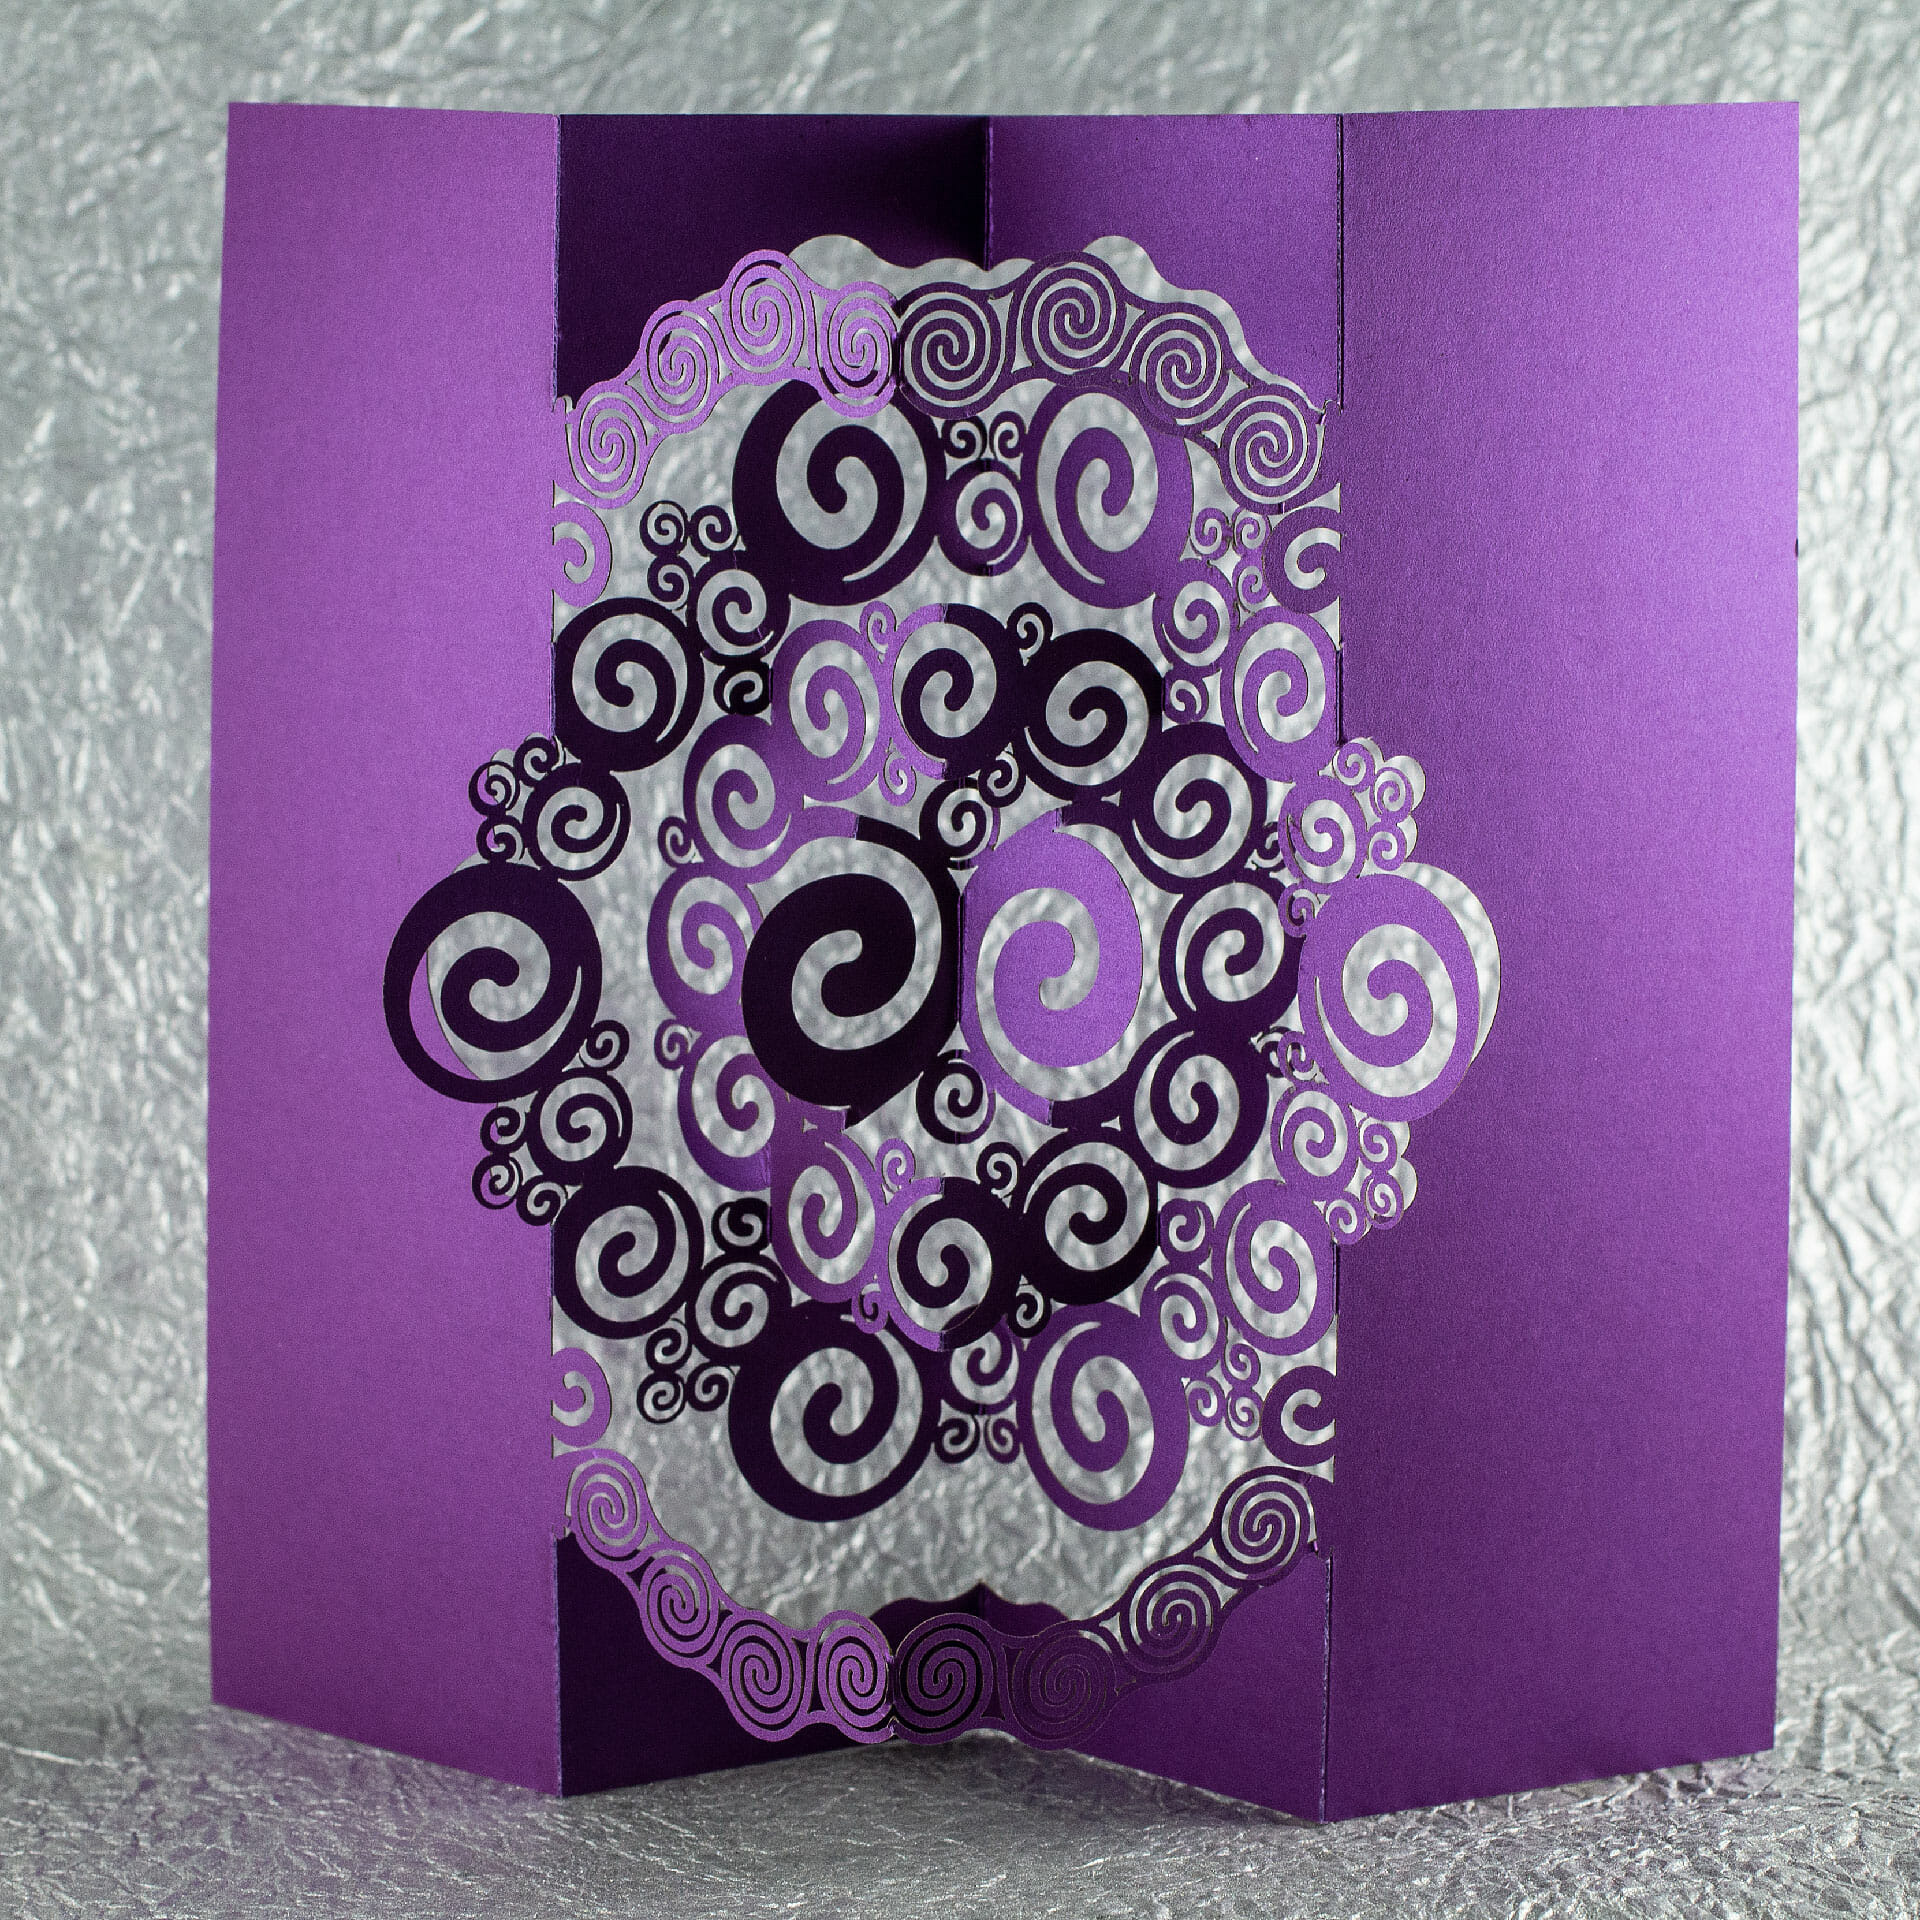
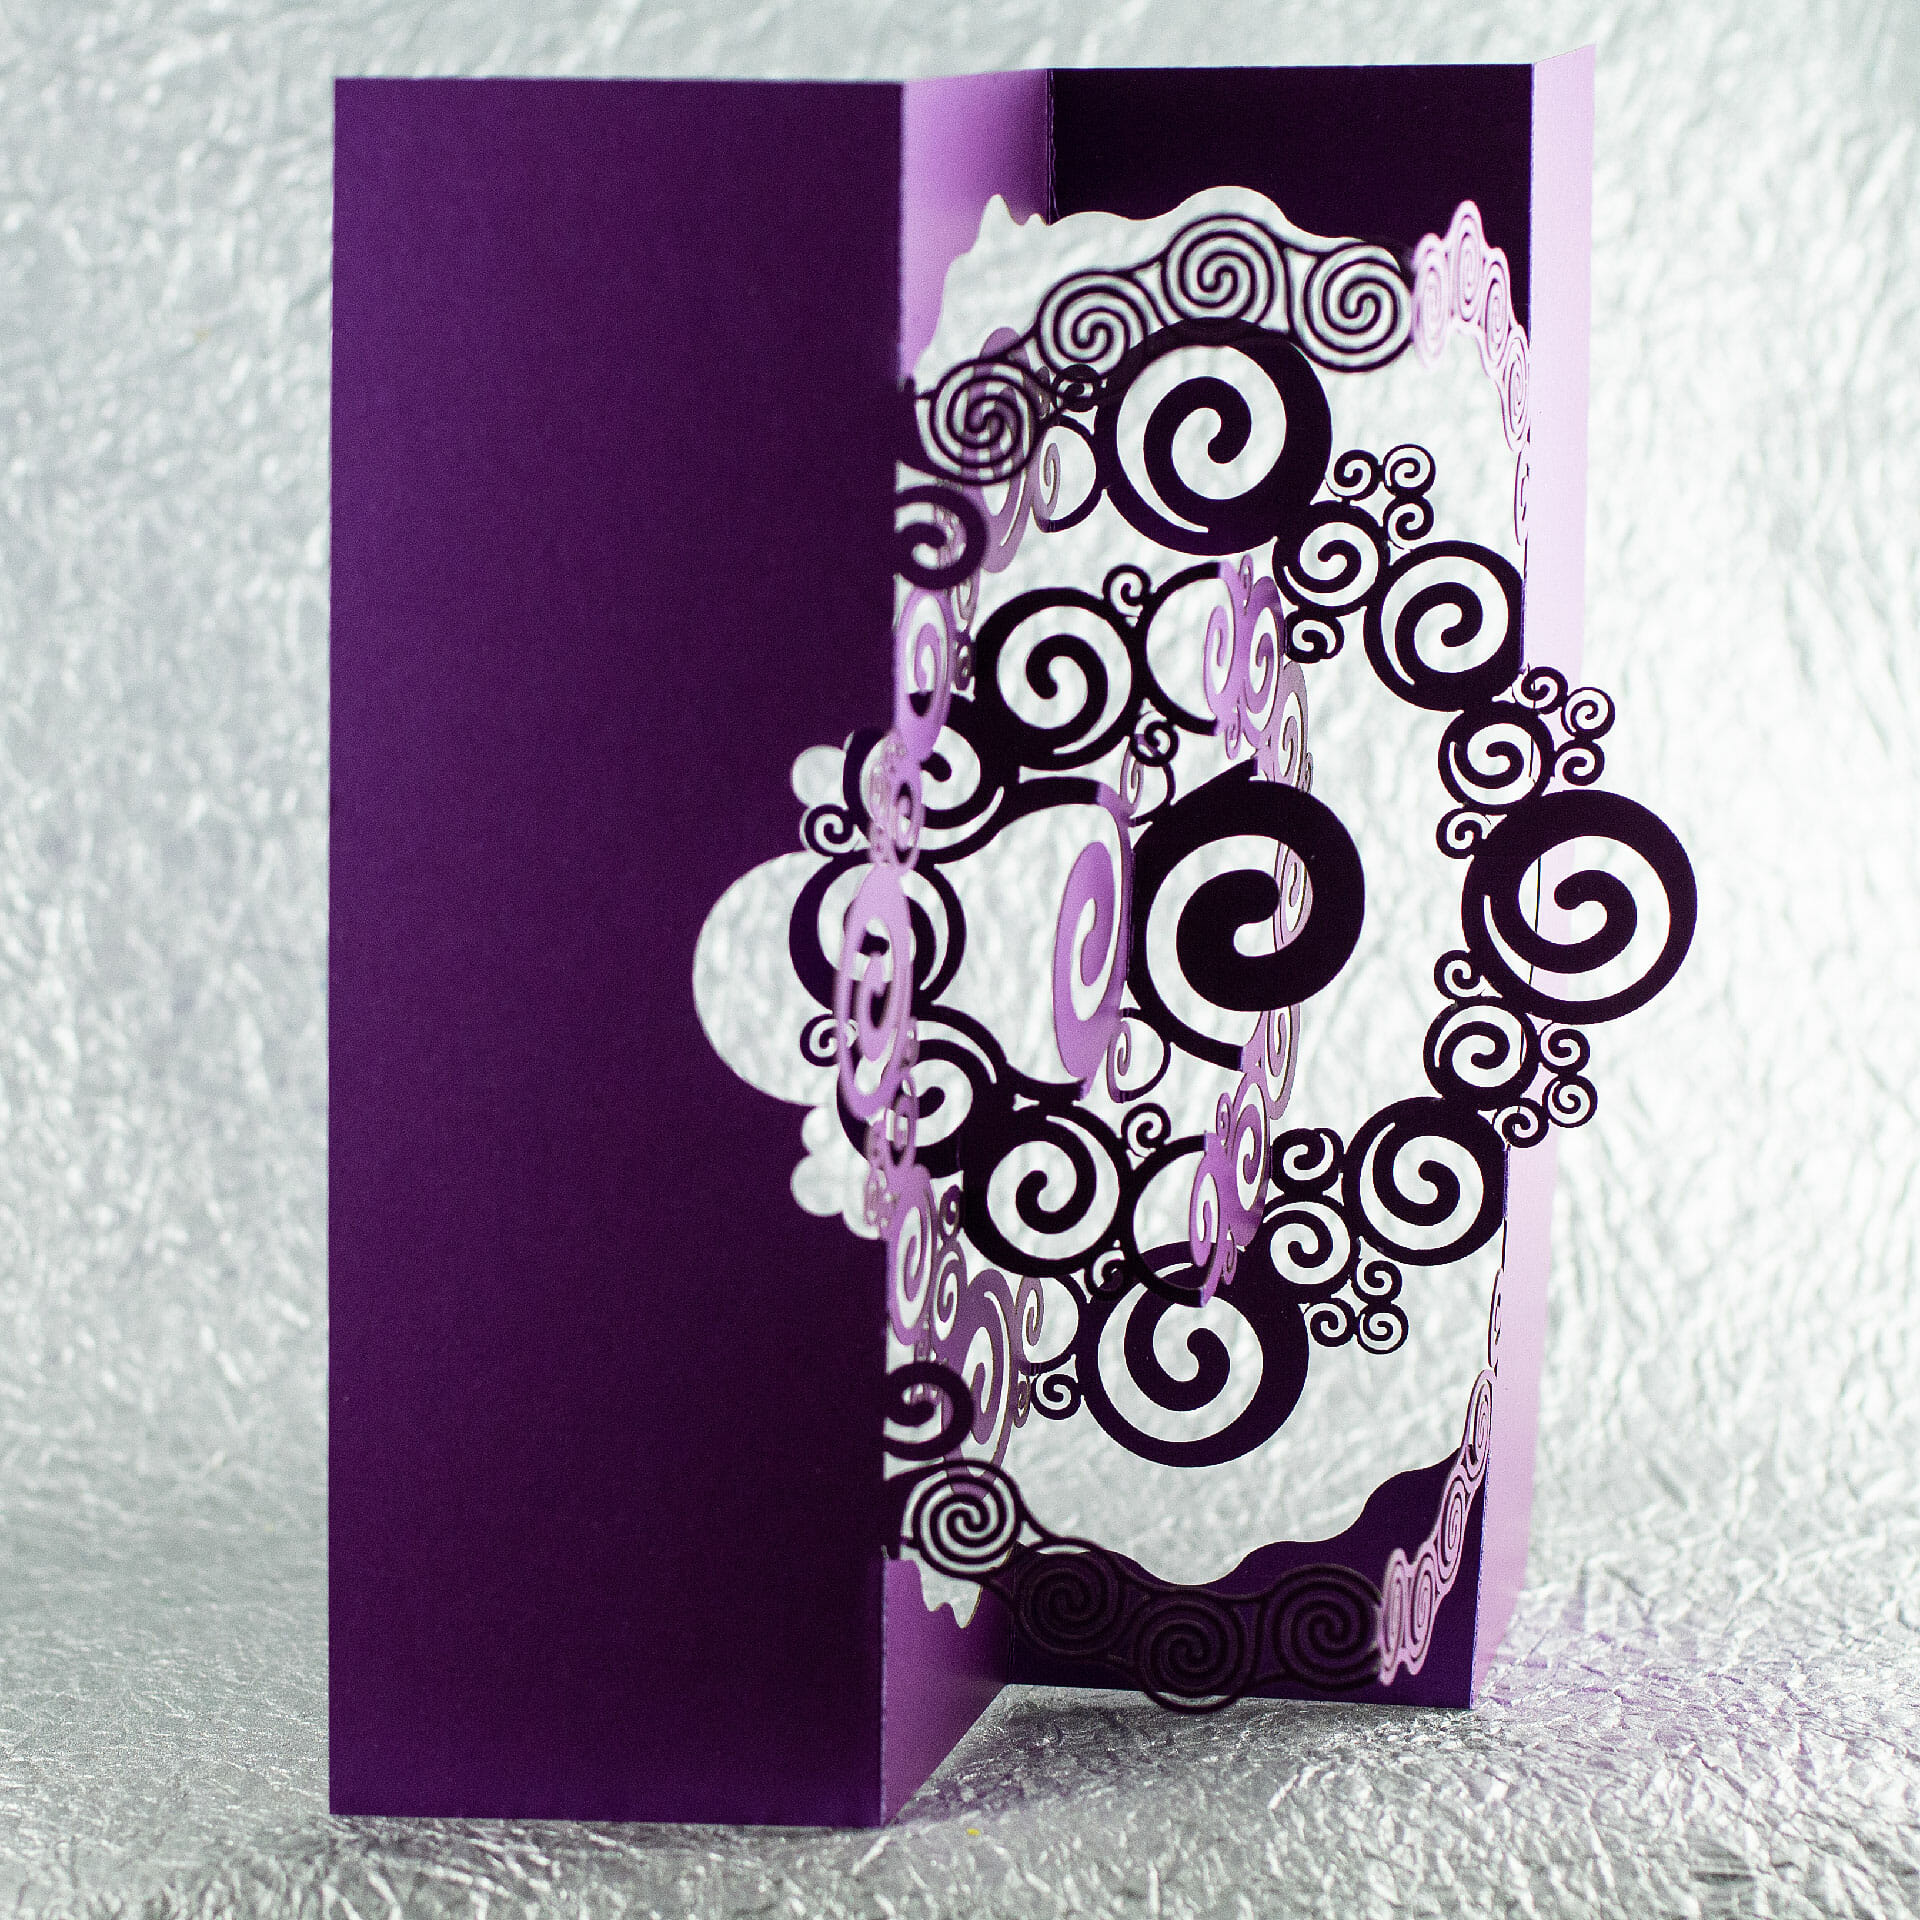
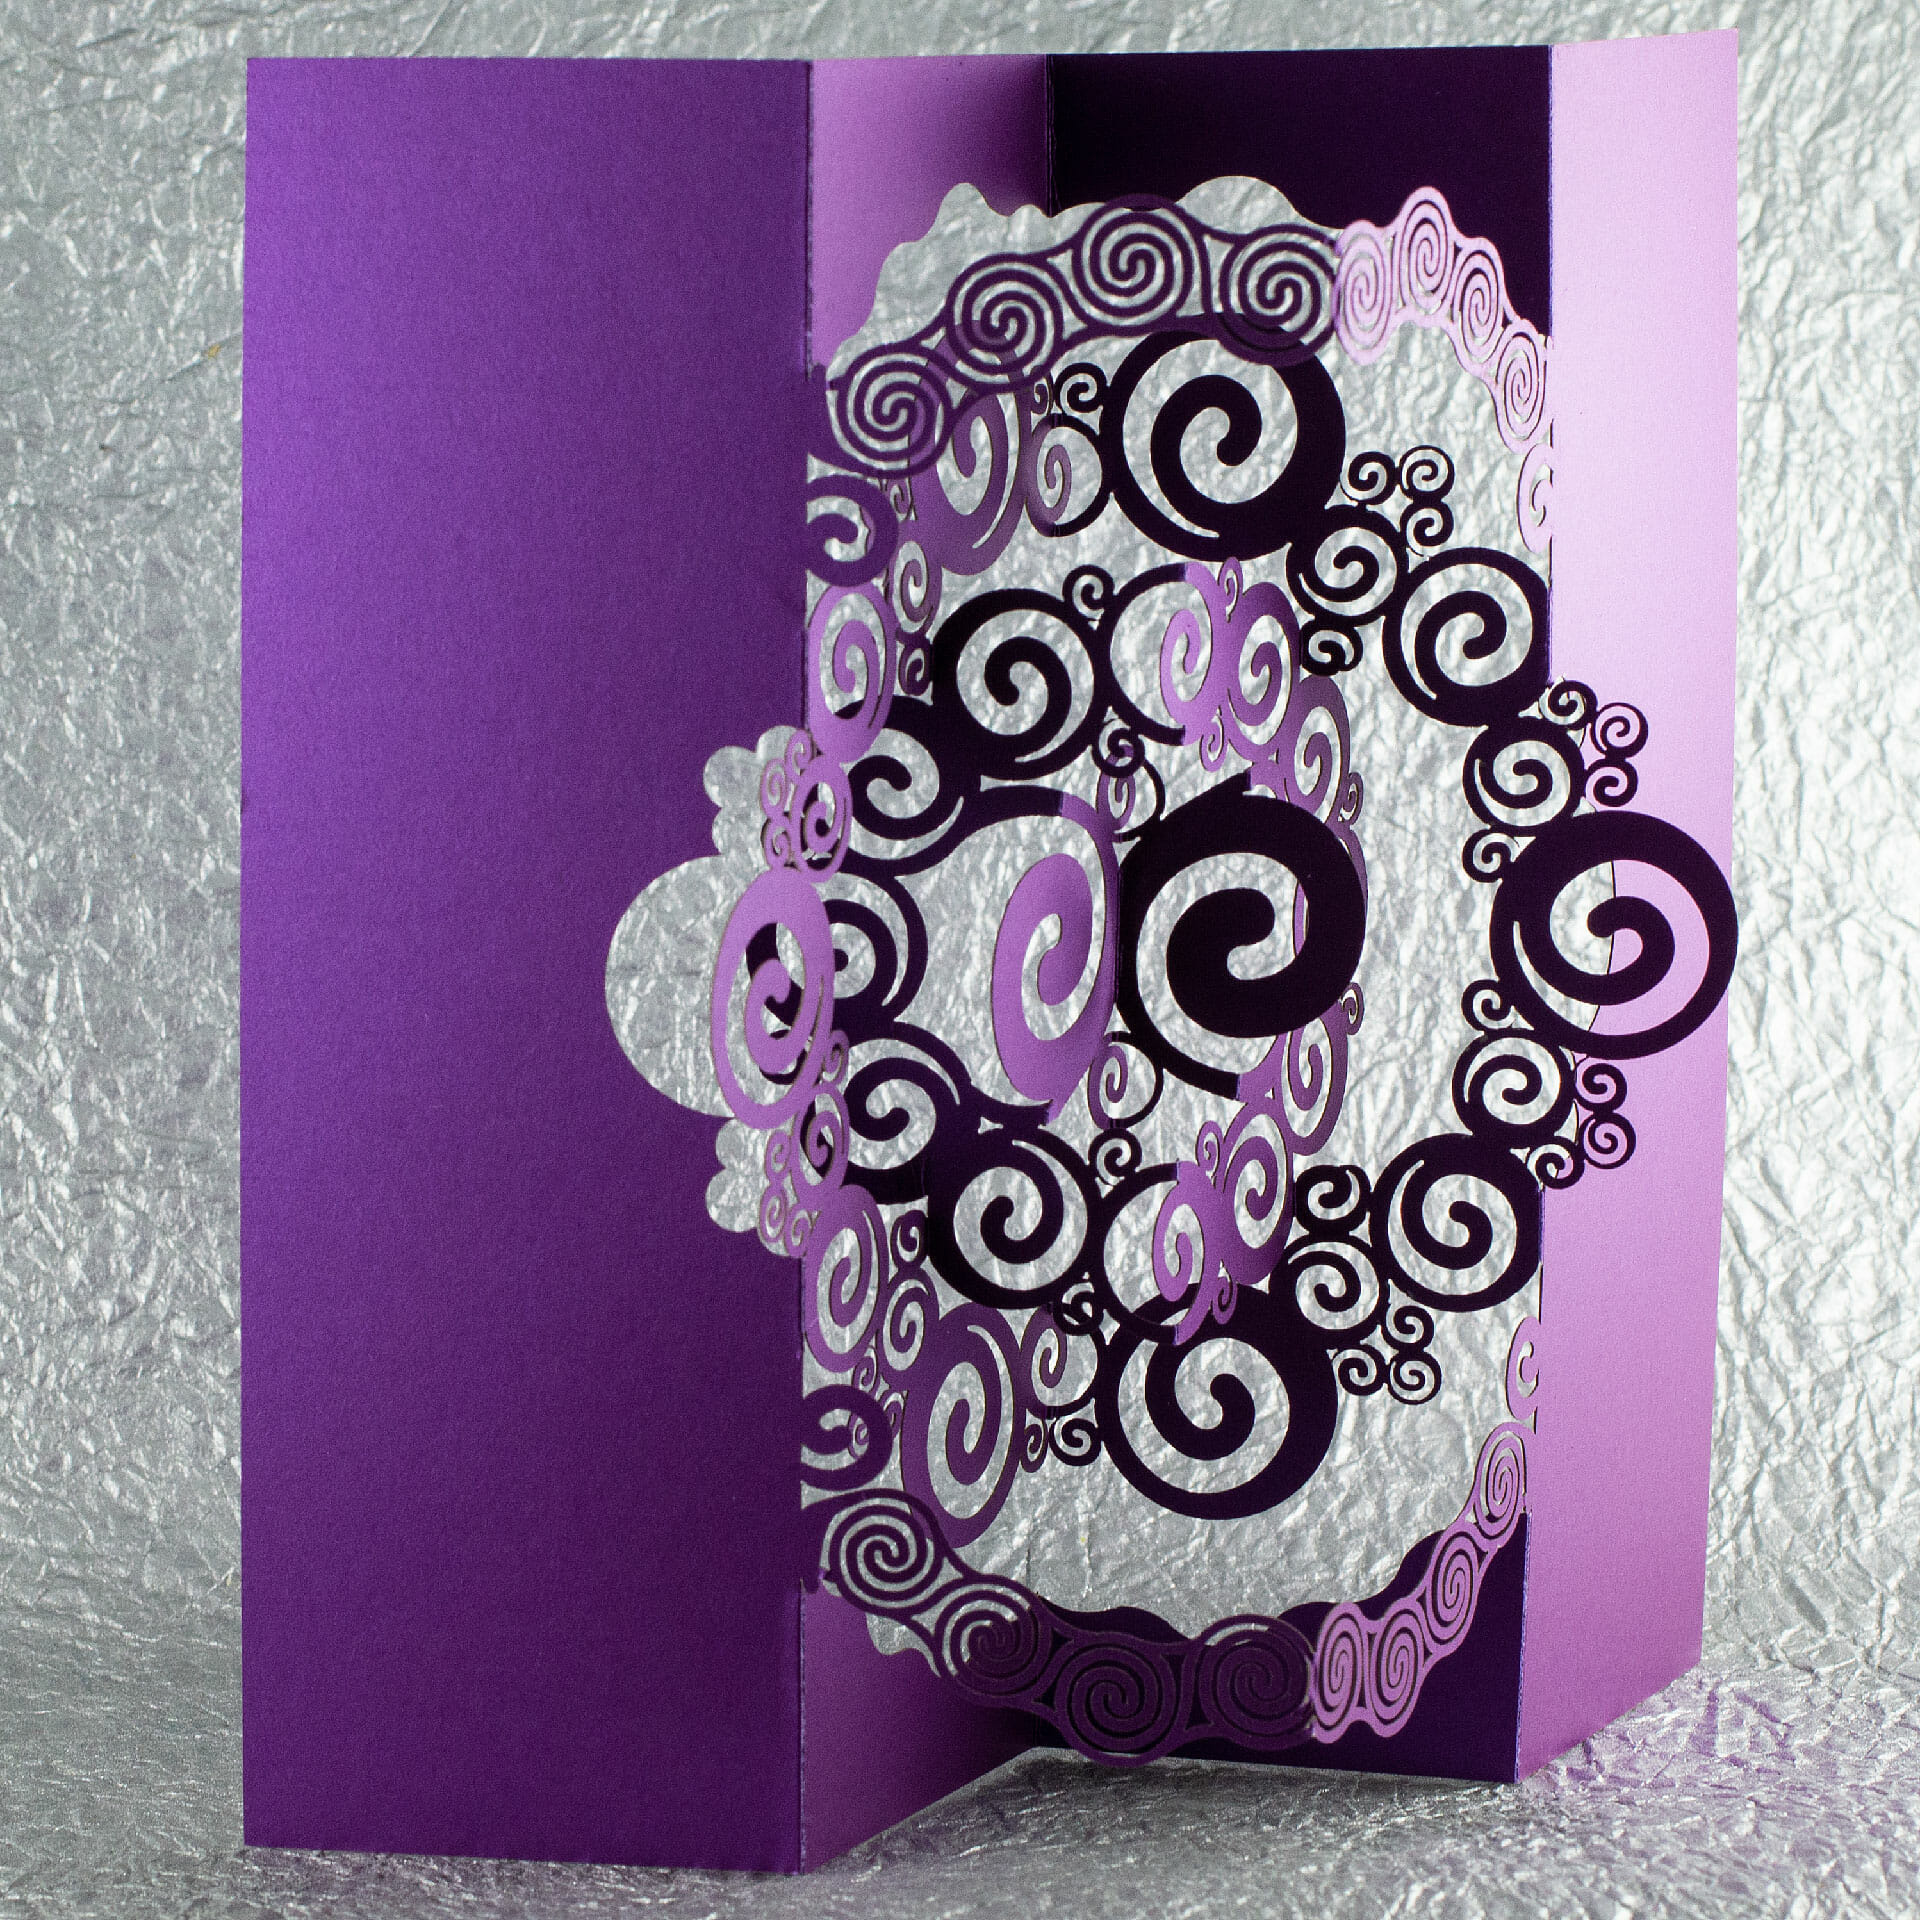
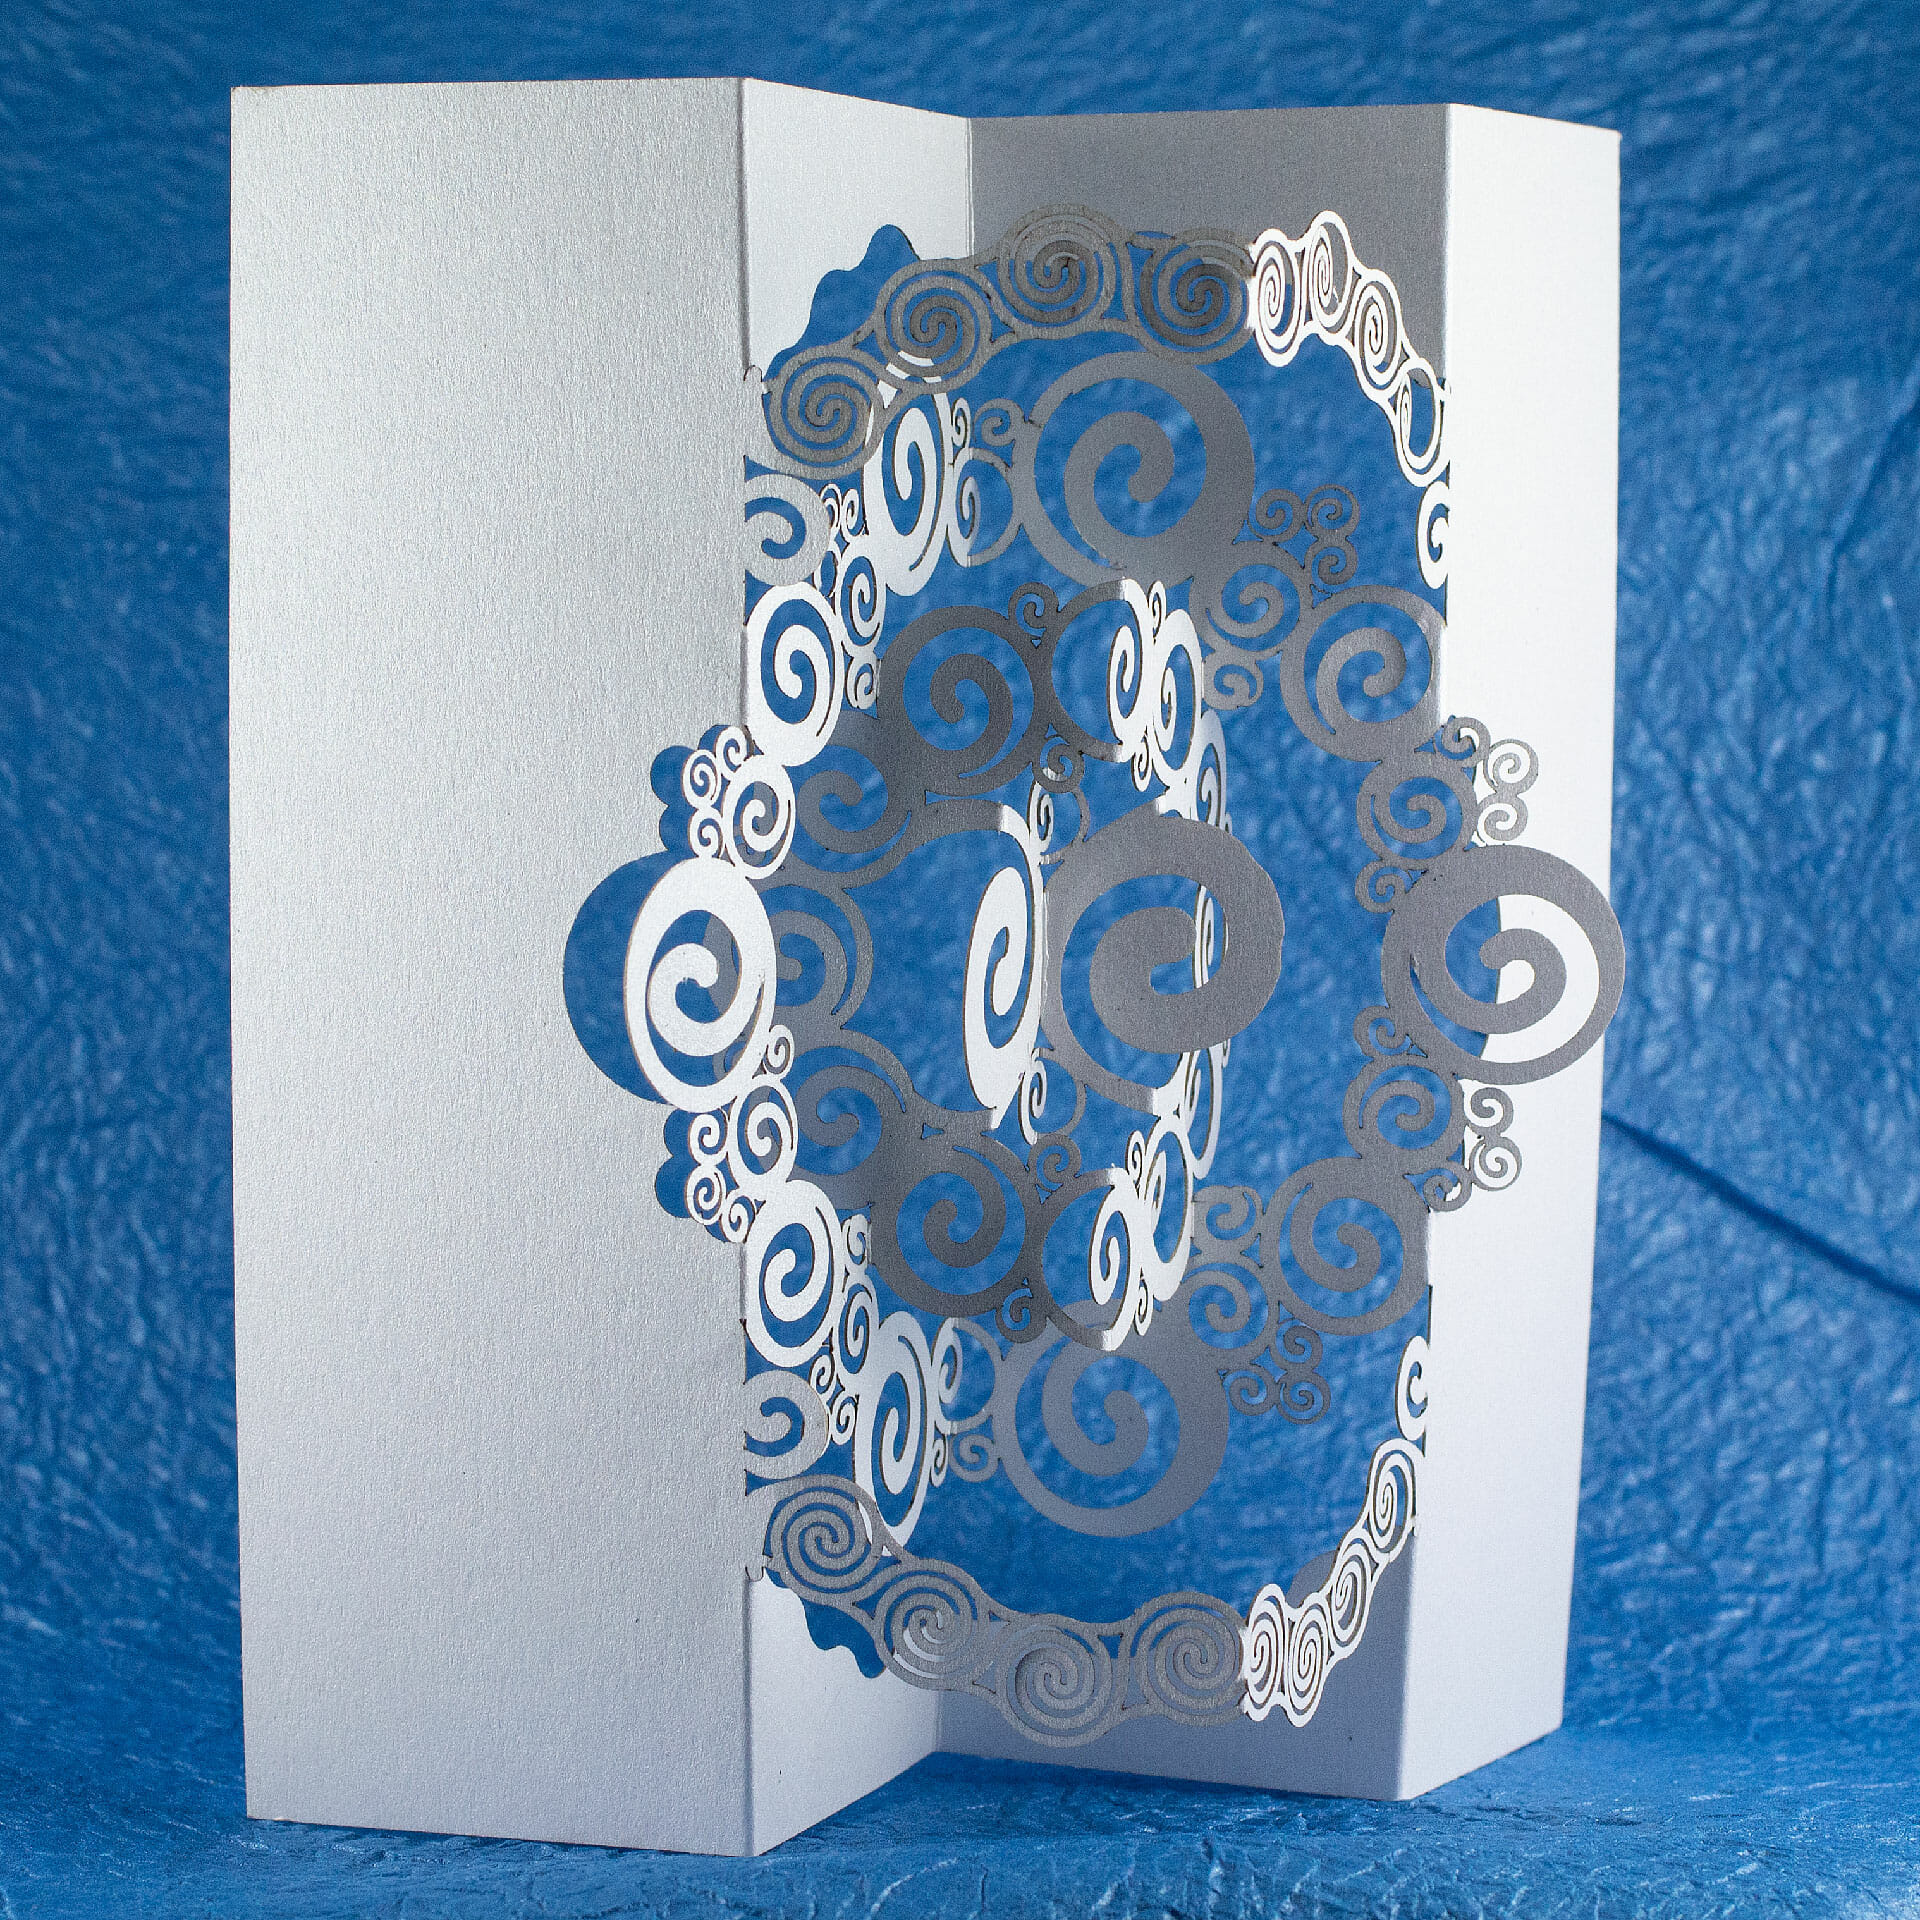
Here is a short folding video for the Spiraling pop up card design.
